Zabbix-Server (CentOS-7 + Supervisor)


![]()

Docker Image with Zabbix Server using CentOS-7 and Supervisor.
Image is using external datbase.
This image is using offcial zabbix-server-2.4 Docker Image as base image.
Installed Plugins
Email Notifications with authorisation
Slack Notifications
Nginx Status/nginx_status
PHP-FPM Status/fpm_status
Database deployment
To be able to connect to database we would need one to be running first. Easiest way to do that is to use another docker image. For this purpose we will use our million12/mariadb image as our database.
**For more information about million12/MariaDB see our documentation. **
Example:
docker run \
	-d \
	--name zabbix-db \
	-p 3306:3306 \
	--env="MARIADB_USER=username" \
	--env="MARIADB_PASS=my_password" \
	million12/mariadb
Remember to use the same credentials when deploying zabbix-server image.
Environmental Variable
IYou can use environmental variables to config Zabbix server and PHP. Available
variables:, Variable, Default value, --------, -------------, PHP_date_timezone, UTC, PHP_max_execution_time, 300, PHP_max_input_time, 300, PHP_memory_limit, 128M, PHP_error_reporting, E_ALL, ZS_ListenPort, 10051, ZS_SourceIP, ZS_LogFile, /tmp/zabbix_server.log, ZS_LogFileSize, 10, ZS_DebugLevel, 3, ZS_PidFile, /var/run/zabbix_server.pid, ZS_DBHost, zabbix.db, ZS_DBName, zabbix, ZS_DBSchema, ZS_DBUser, zabbix, ZS_DBPassword, zabbix, ZS_DBSocket, /tmp/mysql.sock, ZS_DBPort, 3306, ZS_StartPollers, 5, ZS_StartPollersUnreachable, 1, ZS_StartTrappers, 5, ZS_StartPingers, 1, ZS_StartDiscoverers, 1, ZS_StartHTTPPollers, 1, ZS_StartTimers, 1, ZS_JavaGateway, 127.0.0.1, ZS_JavaGatewayPort, 10052, ZS_StartJavaPollers, ZS_StartVMwareCollectors, ZS_VMwareFrequency, 60, ZS_VMwarePerfFrequency, 60, ZS_VMwareCacheSize, 8M, ZS_VMwareTimeout, 10, ZS_SNMPTrapperFile, /tmp/zabbix_traps.tmp, ZS_StartSNMPTrapper, ZS_ListenIP, 0.0.0.0, ZS_HousekeepingFrequency, 1, ZS_MaxHousekeeperDelete, 500, ZS_SenderFrequency, 30, ZS_CacheSize, 8M, ZS_CacheUpdateFrequency, 60, ZS_StartDBSyncers, 4, ZS_HistoryCacheSize, 8M, ZS_TrendCacheSize, 4M, ZS_HistoryTextCacheSize, 16M, ZS_ValueCacheSize, 8M, ZS_Timeout, 3, ZS_TrapperTimeout, 300, ZS_UnreachablePeriod, 45, ZS_UnavailableDelay, 60, ZS_UnreachableDelay, 15, ZS_AlertScriptsPath, /usr/local/share/zabbix/alertscripts, ZS_ExternalScripts, /usr/local/share/zabbix/externalscripts, ZS_FpingLocation, /usr/sbin/fping, ZS_Fping6Location, /usr/sbin/fping6, ZS_SSHKeyLocation, ZS_LogSlowQueries, ZS_TmpDir, /tmp, ZS_StartProxyPollers, 1, ZS_ProxyConfigFrequency, 3600, ZS_ProxyDataFrequency, 1, ZS_AllowRoot, ZS_User, zabbix, ZS_Include, ZS_SSLCertLocation, /usr/local/share/zabbix/ssl/certs, ZS_SSLKeyLocation, /usr/local/share/zabbix/ssl/keys, ZS_SSLCALocation, ZS_LoadModulePath, /usr/lib/zabbix/modules, ZS_LoadModule, #### Configuration from volume
Full config files can be also used. Environment configs will be overriden by
values from config files in this case. You need only to add /etc/custom-config/
volume:
-v /host/custom-config/:/etc/custom-config/
Available files:, File, Description, ----, -----------, php-zabbix.ini, PHP configuration file, zabbix_server.conf, Zabbix server configuration file, ### Zabbix-Server Deployment
Now when we have our database running we can deploy zabbix-server image with appropriate environmental variables set.
Example:
docker run \
	-d \
	--name zabbix \
	-p 80:80 \
	-p 10051:10051 \
	--link zabbix-db:zabbix.db \
	--env="ZS_DBHost=zabbix.db" \
	--env="ZS_DBUser=zabbix" \
	--env="ZS_DBPassword=my_password" \
	million12/zabbix-server
With email settings and Slack integration and custom timezone:
docker run \
	-d \
	--name zabbix \
	-p 80:80 \
	-p 10051:10051 \
	--link zabbix-db:zabbix.db \
	--env="ZS_DBHost=zabbix.db" \
	--env="ZS_DBUser=zabbix" \
	--env="ZS_DBPassword=my_password" \
	--env="ZABBIX_ADMIN_EMAIL=default@domain.com" \
	--env="ZABBIX_SMTP_SERVER=default.smtp.server.com" \
	--env="ZABBIX_SMTP_USER=default.smtp.username" \
	--env="ZABBIX_SMTP_PASS=default.smtp.password" \
	--env="SLACK_WEBHOOK=https://hooks.slack.com/services/QQ3PTH/B67THC0D3/ABCDGabcDEF124" \
	million12/zabbix-server
With MySQL/MariaDB linked container:
docker run \
	-d \
	--name zabbix \
	-p 80:80 \
	-p 10051:10051 \
	--link some-mariadb:db \
	million12/zabbix-server
Access Zabbix-Server web interface
To log in into zabbix web interface for the first time use credentials
Admin:zabbix.
Access web interface under http://docker_host_ip
Follow the on screen instructions.
Zabbix Push Notifications
Zabbix notification script is located in /usr/local/share/zabbix/alertscripts
Please follow Zabbkit manual to configure notifications.
Email Notifications (Server settings)
Using environmental variables on docker run you can edit default email server settings. Valuse would be added on into /usr/local/share/zabbix/alertscripts/zabbix_sendmail.sh.
Environmental variables are:
ZABBIX_ADMIN_EMAIL=default@domain.com
ZABBIX_SMTP_SERVER=default.smtp.server.com
ZABBIX_SMTP_USER=default.smtp.username
ZABBIX_SMTP_PASS=default.smtp.password
Configuration:
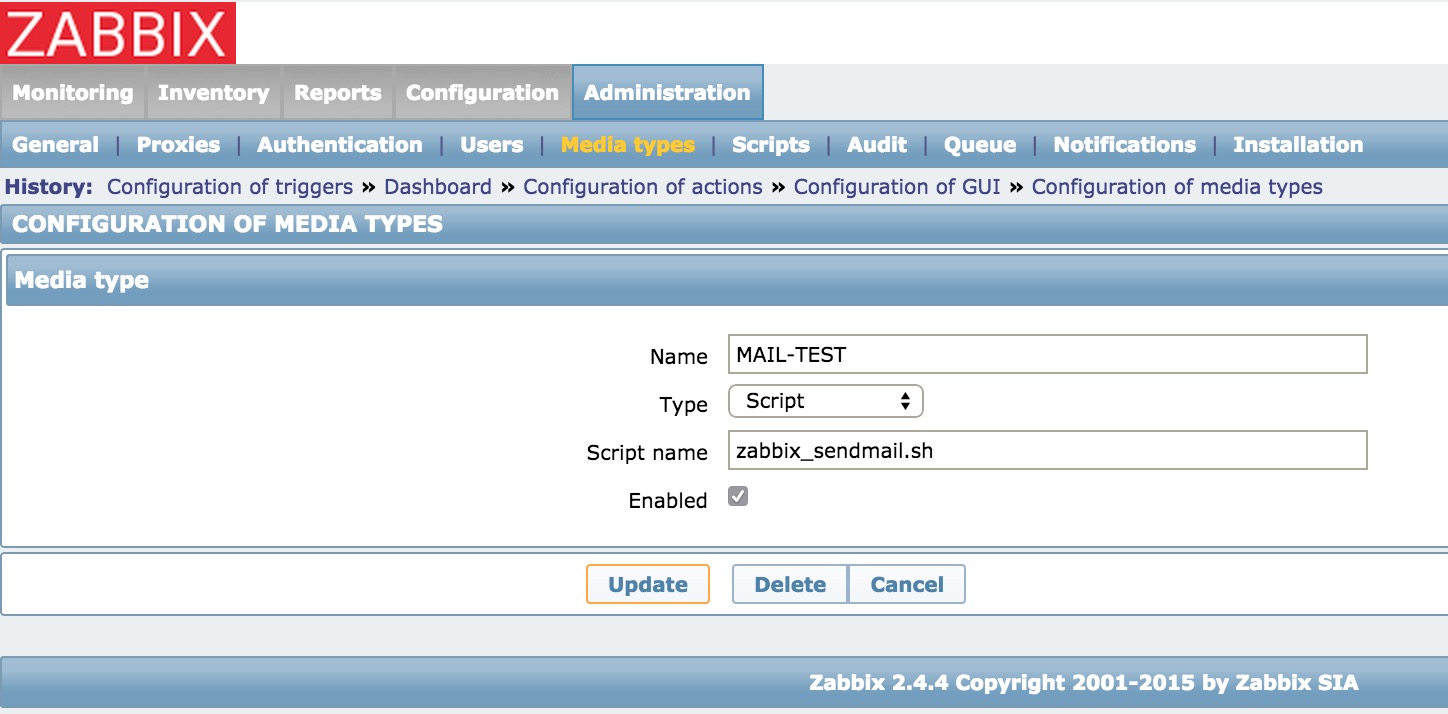
Go into Administration/Media types and add new type using script as Type. Script name should be zabbix_sendmail.sh
Next go to Configuration/Actions and create new action. Select recovery message.

Next select tab Operations and click New to add new action. In Send to User groups add Zabbix Adminstrator or any user group you like. In Send only to select Name of your previously created Media type name.

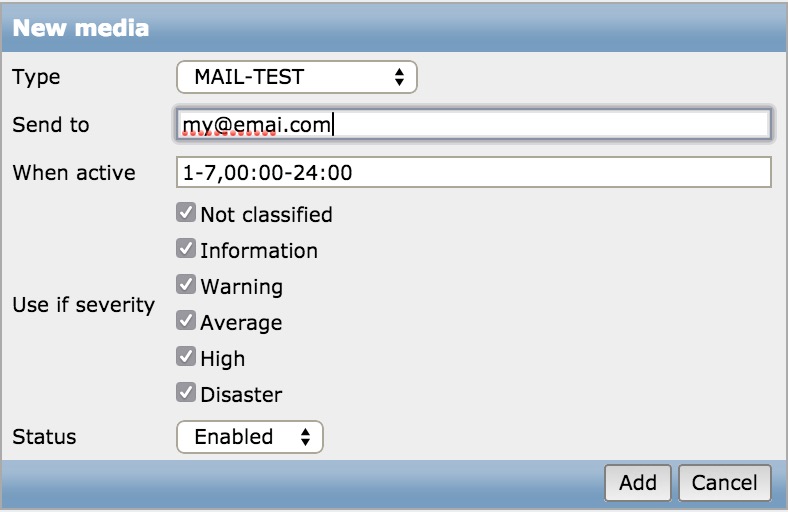
Next go to Administration/Users and select your user. Go to Media tab and add new Media. In Type select your Media type you have created in first step. Add your email addess and enjoy receiving emails.
Slack Integration
This docker image comes with Slack integrations script. You need to provide your WebHook generated in yo your Slack account. it should look like https://hooks.slack.com/services/QQ3PTH/B67THC0D3/ABCDGabcDEF124
Note: this Slack Integration script is based on one originally developed by ericoc/zabbix-slack-alertscript.
For deatiled installation please see ericoc instructions.
Nginx Status Template
Nginx stats script is located in /usr/local/share/zabbix/externalscripts/.
It's latest version of vicendominguez/nginx-zabbix-template official Zabbix communty repo.
Gathering data is done by getNginxInfo.py which is already installed in this image. User need to install template to be able to use this feature.
Go to Configuration/Templates and select Import and import file located in this repo in templates-files directory called zbx_nginx_template.xml
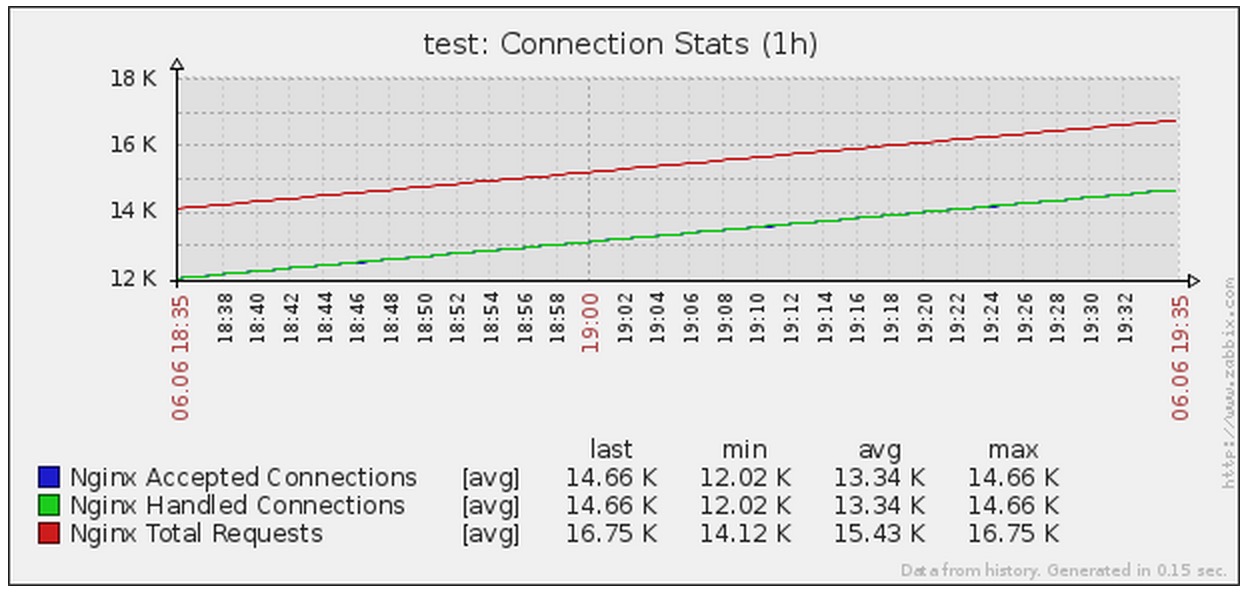
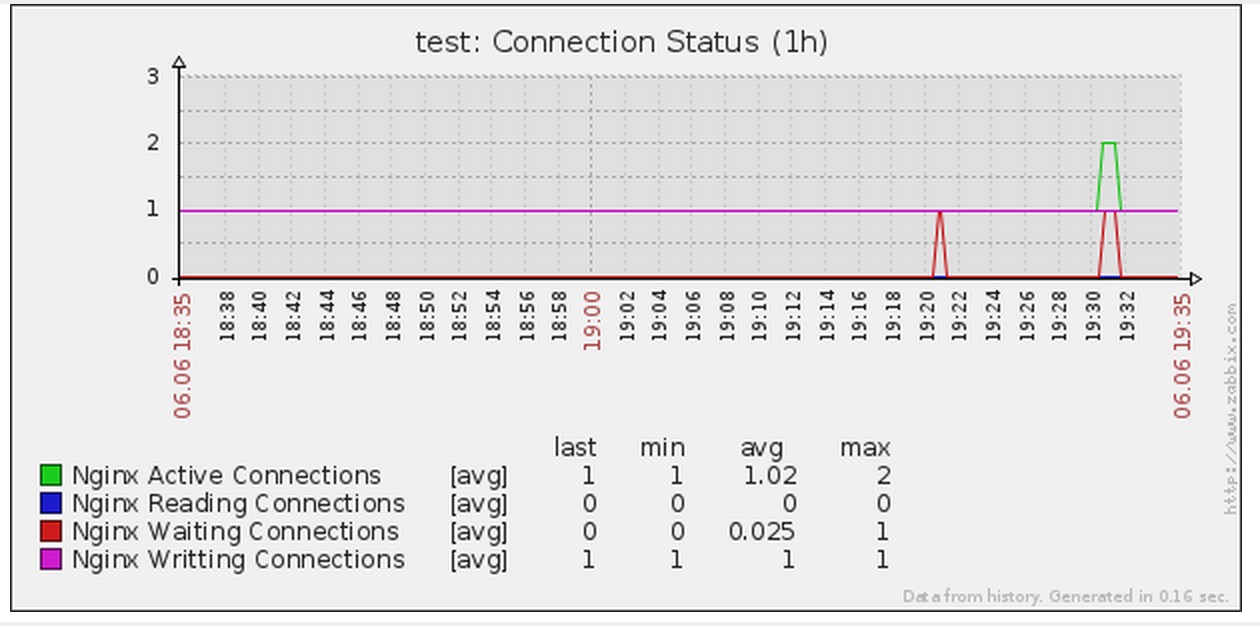
More details in official documentation here.
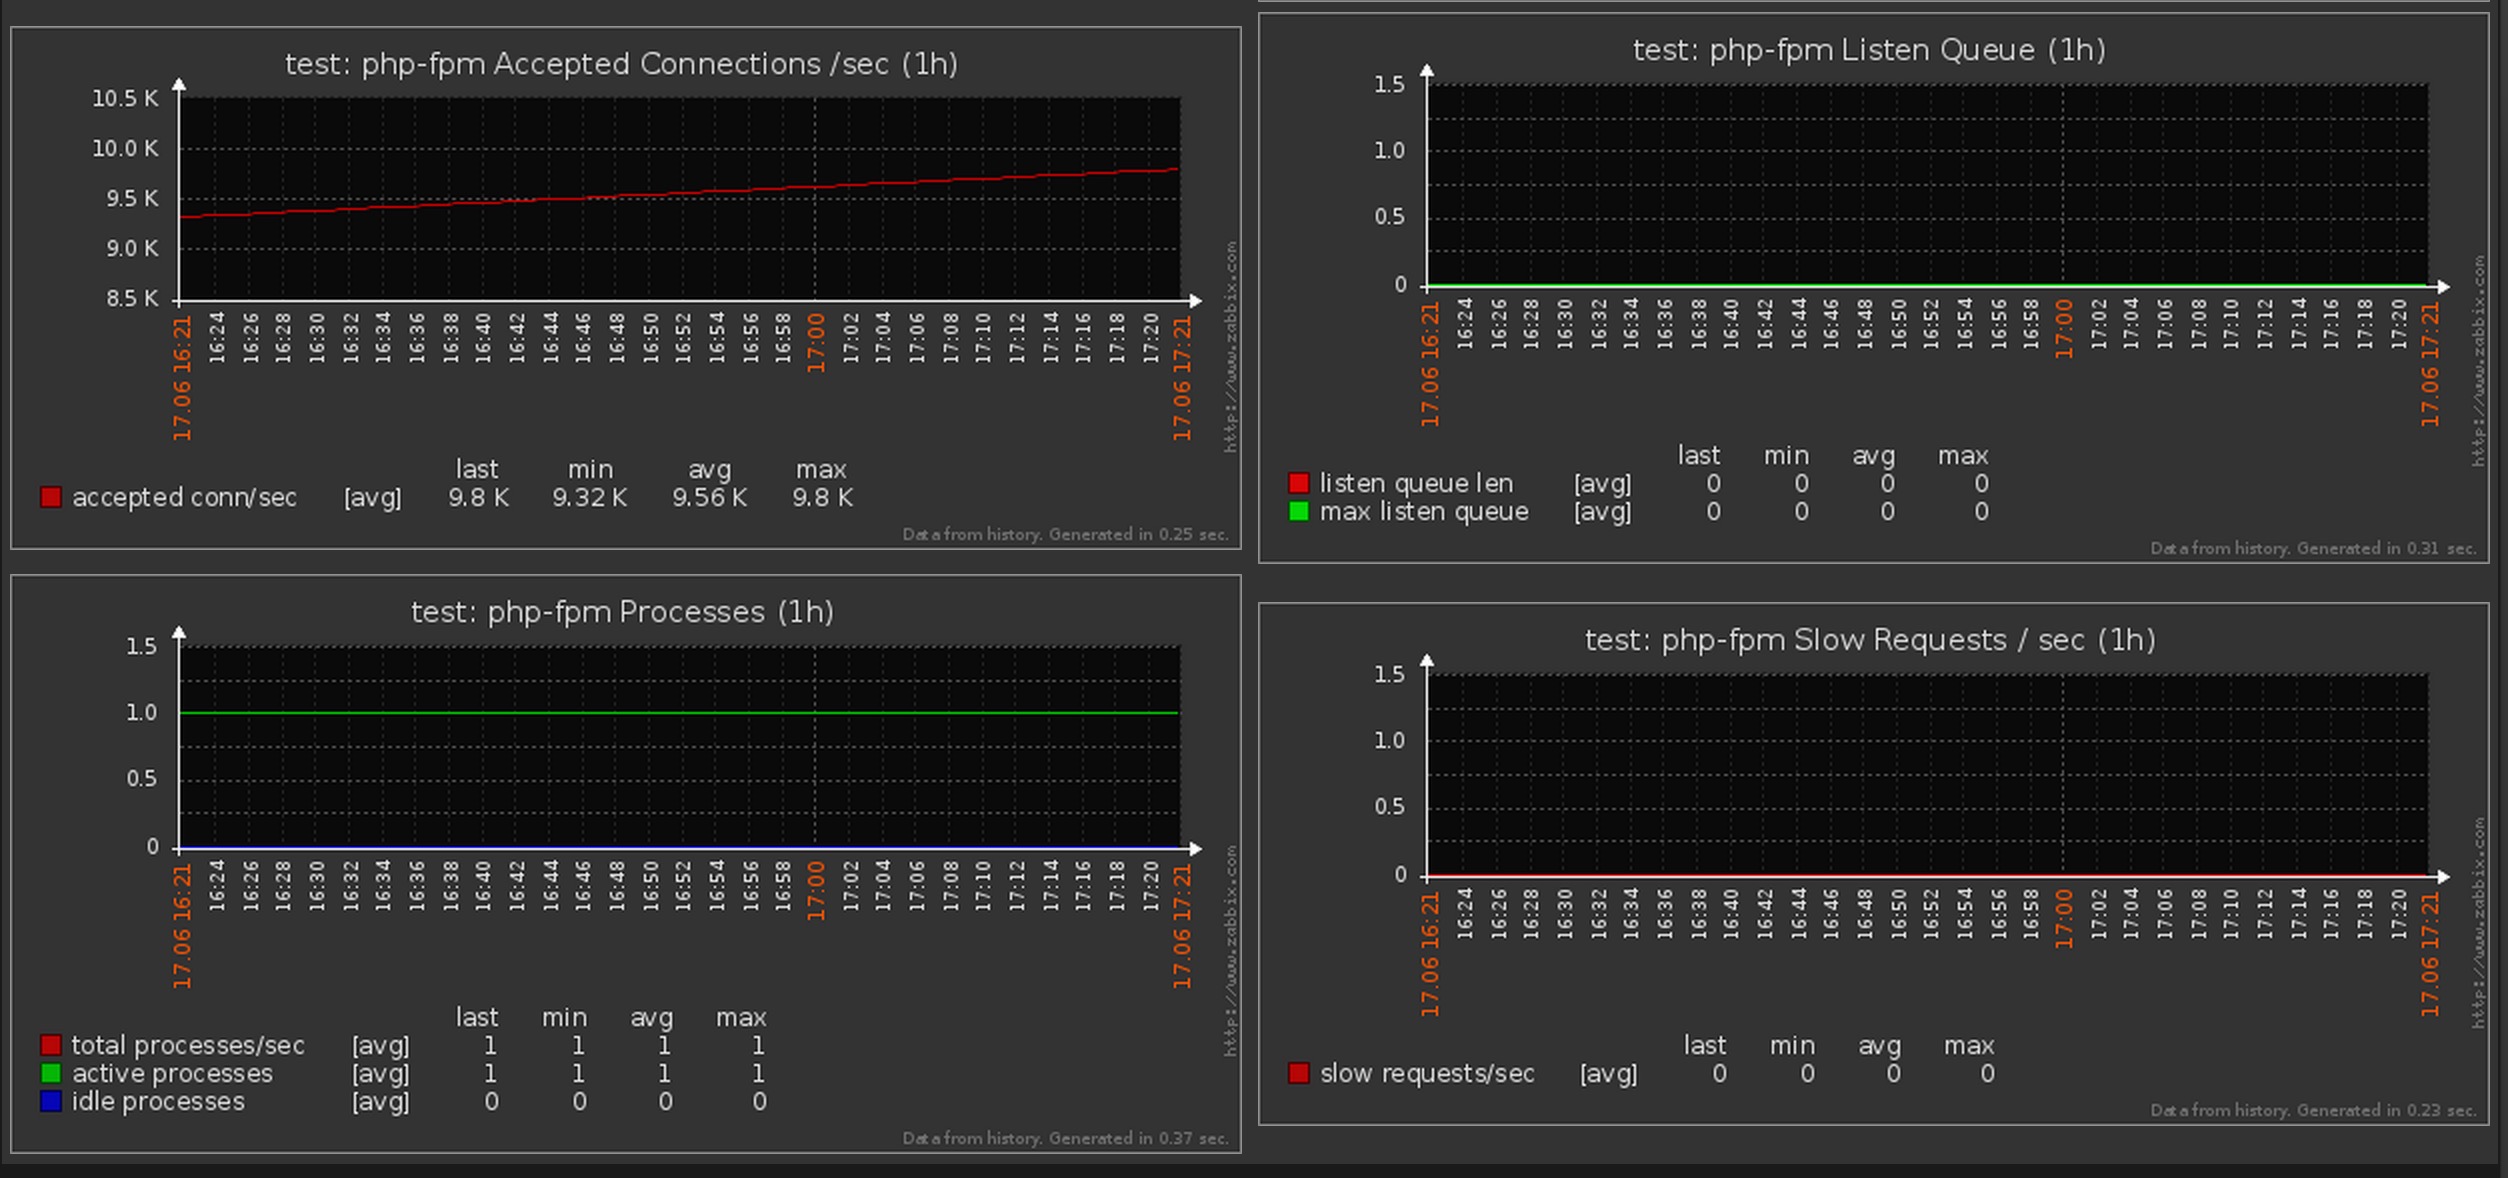
PHP-FPM Status Template
PHP-FPM Status template assumes that your Nginx server is configured to serve stats under /fpm_status url and port 80. If you you want to use custom port please edit necessary files.
Example of nginx.conf file:
location /fpm_status {
access_log off;
allow 127.0.0.1;
deny all;
include fastcgi_params;
fastcgi_param SCRIPT_FILENAME $document_root$fastcgi_script_name;
fastcgi_pass php-upstream;
}
Installation:
Go to Configuration/Templates and select Import and import file located in this repo in templates-files directory called zabbix-php-fpm-template.xml
Screenshots:
Docker troubleshooting
Use docker command to see if all required containers are up and running:
$ docker ps
Check logs of Zabbix server container:
$ docker logs zabbix
Sometimes you might just want to review how things are deployed inside a running
container, you can do this by executing a bash shell through docker's
exec command:
docker exec -ti zabbix /bin/bash
History of an image and size of layers:
docker history --no-trunc=true million12/zabbix-server, tr -s ' ', tail -n+2, awk -F " ago " '{print $2}'
Author
Author: Przemyslaw Ozgo (linux@ozgo.info)
Sponsored by Typostrap.io - the new prototyping tool for building highly-interactive prototypes of your website or web app. Built on top of TYPO3 Neos CMS and Zurb Foundation framework.