nb is a command line note-taking, bookmarking, archiving,
and knowledge base application with:
- plain-text data storage,
- encryption,
- filtering and search,
- Git-backed versioning and syncing,
- Pandoc-backed conversion,
- global and local notebooks,
- customizable color themes,
- extensibility through plugins,
and more, all in a single portable, user-friendly script.
nb creates notes in text-based formats like
Markdown,
Emacs Org mode,
and LaTeX,
can work with files in any format, can import and export notes to many
document formats, and can create private, password-protected encrypted
notes and bookmarks. With nb, you can write notes using Vim, Emacs,
VS Code, Sublime Text, and any other text editor you like. nb works in
any standard Linux / Unix environment, including macOS and Windows via WSL.
Optional dependencies can be installed to enhance functionality,
but nb works great without them.
nb is also a powerful text-based CLI bookmarking system that includes:
- local full-text search of cached page content with regular expression support,
- tagging,
- convenient filtering and listing,
- Internet Archive Wayback Machine snapshot lookup for
broken links, - easy viewing of bookmarked pages in the terminal and your regular web browser.
Page information is automatically downloaded, compiled, and saved into normal Markdown
documents made for humans, so bookmarks are easy to edit just like any other note.
nb uses Git in the background to automatically
record changes and sync notebooks with remote repositories.
nb can also be configured to sync notebooks using a general purpose
syncing utility like Dropbox so notes can be edited in other apps
on any device.
nb is designed to be portable, future-focused, and vendor independent,
providing a full-featured and intuitive experience within a highly composable
user-centric text interface.
The entire program is a single well-tested shell script that can be installed,
copied, or curled almost anywhere and just work, using
progressive enhancement
for various experience improvements in more capable environments. nb works great
whether you have one notebook with just a few notes or dozens of
notebooks containing thousands of notes, bookmarks, and other items.
nb makes it easy to incorporate other tools, writing apps, and workflows.
nb can be used a little, a lot, once in a while, or for just a subset of
features. nb is flexible.
Installation
Dependencies
Required
- Bash
nbworks perfectly with Zsh, fish, and any other shell set as your
primary login shell, the system just needs to have Bash available on it.
- Git
- A text editor with command line support, such as:
Optional
nb leverages standard command line tools and works in standard
Linux / Unix environments. nb also checks the environment for some
additional optional tools and uses them to enhance the experience whenever
they are available.
Recommended:
Also supported for various enhancements:
Ack,
afplay,
Ag - The Silver Searcher,
exa,
ffplay,
ImageMagick,
GnuPG,
highlight,
imgcat,
kitty's icat kitten,
Lynx,
Midnight Commander,
mpg123,
MPlayer,
note-link-janitor
(via plugin),
pdftotext,
Pygments,
Ranger,
readability-cli,
termpdf.py
macOS / Homebrew
To install with Homebrew:
brew tap xwmx/taps
brew install nb
Installing nb with Homebrew also installs the recommended dependencies
above and completion scripts for Bash and Zsh.
Ubuntu, Windows WSL, and others
npm
To install with npm:
npm install -g nb.sh
After npm installation completes, run sudo nb completions install to
install Bash and Zsh completion scripts (recommended).
On Ubuntu and WSL, you can run sudo nb env install to install
the optional dependencies.
nb is also available under its original package name,
notes.sh,
which comes with an extra notes executable wrapping nb.
Download and Install
To install as an administrator, copy and paste one of the following multi-line
commands:
# install using wget
sudo wget https://raw.github.com/xwmx/nb/master/nb -O /usr/local/bin/nb &&
  sudo chmod +x /usr/local/bin/nb &&
  sudo nb completions install

# install using curl
sudo curl -L https://raw.github.com/xwmx/nb/master/nb -o /usr/local/bin/nb &&
  sudo chmod +x /usr/local/bin/nb &&
  sudo nb completions install
On Ubuntu and WSL, you can run sudo nb env install to install
the optional dependencies.
User-only Installation
To install with just user permissions, simply add the nb script to your
$PATH. If you already have a ~/bin directory, for example, you can use
one of the following commands:
# download with wget
wget https://raw.github.com/xwmx/nb/master/nb -O ~/bin/nb && chmod +x ~/bin/nb

# download with curl
curl -L https://raw.github.com/xwmx/nb/master/nb -o ~/bin/nb && chmod +x ~/bin/nb
Installing with just user permissions doesn't include the optional
dependencies or completions, but nb works without them. If you have
sudo access and want to install the completion scripts and
dependencies, run the following command:
sudo nb env install
Make
To install with Make,
clone this repository, navigate to the clone's root directory, and run:
sudo make install
This will also install the completion scripts on all systems and the
recommended dependencies on Ubuntu and WSL.
bpkg
To install with bpkg:
bpkg install xwmx/nb
Tab Completion
Bash and Zsh tab completion should be enabled when nb is installed using
the methods above, assuming you have the appropriate system
permissions or installed with sudo. If completion isn't working after
installing nb, see the completion installation
instructions.
Updating
When nb is installed using a package manager like npm or
Homebrew, use the package manager's upgrade functionality to update nb to
the latest version. When installed via other methods, nb can be updated to
the latest version using the nb update subcommand.
Overview
To get started, simply run:
nb
nb sets up your initial "home" notebook the first time it runs.
By default, notebooks and notes are global (at ~/.nb), so they are always available to
nb regardless of the current working directory. nb also supports
local notebooks.
📝 Notes
Adding Notes
Use nb add to create new notes:
# create a new note in your text editor
nb add

# create a new note with the filename "example.md"
nb add example.md

# create a new note containing "This is a note."
nb add "This is a note."

# create a new note with piped content
echo "Note content.", nb add

# create a new password-protected, encrypted note titled "Secret Document"
nb add --title "Secret Document" --encrypt

# create a new note in the notebook named "example"
nb example:add "This is a note."
nb add with no arguments or input will open the new, blank note in your
environment's preferred text editor. You can change your editor using the
$EDITOR environment variable or nb set editor.
nb files are Markdown
files by default. The default file type can be changed to whatever you
like using nb set default_extension.
nb add behaves differently depending on the type of argument it
receives. When a filename with extension is specified, a new note
with that filename is opened in the editor:
nb add example.md
When a string is specified, a new note is immediately created with that
string as the content and the editor is not opened:
> nb add "This is a note."
Added: [5] 20200101000000.md
nb add <string> is useful for quickly jotting down notes directly
via the command line.
When no filename is specified, nb add uses the current datetime as
the filename.
nb add can also recieve piped content, which behaves the same as
nb add <string>:
# create a new note containing "Note content."
> echo "Note content.", nb add
Added: [6] 20200101000100.md

# create a new note containing the clipboard contents on macOS
> pbpaste, nb add
Added: [7] 20200101000200.md

# create a new note containing the clipboard contents using xclip
> xclip -o, nb add
Added: [8] 20200101000300.md
Content can be passed with the --content option, which will also
create a new note without opening the editor:
nb add --content "Note content."
When content is piped, specified with --content, or passed as a
string argument, use the --edit flag to open the file in the editor
before the change is committed.
The title, filename, and content can also be specified with long and
short options:
> nb add --filename "example.md" -t "Example Title" -c "Example content."
Added: [9] example.md "Example Title"
The -t <title> / --title <title> option will also set the filename
to the title, lowercased with spaces and non-filename characters replaced
with underscores:
> nb add --title "Example Title" "Example content."
Added: [10] example_title.md "Example Title"
Files can be created with any file type either by specifying the
extension in the filename or via the --type <type> option:
# open a new org mode file in the editor
nb add example.org

# open a new reStructuredText file in the editor
nb add --type rst
Notes can be tagged simply by adding hashtags anywhere in the document:
#tag1 #tag2
Search for tagged notes and bookmarks with nb search / nb q:
nb search "#tag1"

nb q "#tag2"
For a full list of options available for nb add, run nb help add.
Password-Protected Encrypted Notes and Bookmarks
Password-protected notes and bookmarks are created with
the -e / --encrypt flag and are encrypted with AES-256 using OpenSSL
by default. GPG is also supported and can be configured with
nb set encryption_tool.
Each protected note and bookmark is encrypted individually with its own
password. When an encrypted item is viewed, edited, or opened, nb
will simply prompt for the item's password before proceeding. After an
item is edited, nb automatically re-encrypts it and saves the new
version.
Encrypted notes can also be decrypted using the OpenSSL and GPG command
line tools directly, so you aren't dependent on nb to decrypt your
files.
Shortcut Alias: a
nb includes single-character shortcuts for many commands, including
a for add:
# create a new note in your text editor
nb a

# create a new note with the filename "example.md"
nb a example.md

# create a new note containing "This is a note."
nb a "This is a note."

# create a new note containing the clipboard contents with xclip
xclip -o, nb a

# create a new note in the notebook named "example"
nb example:a
Other Aliases: create, new
nb add can also be invoked with nb create and nb new for convenience:
# create a new note containing "Example note content."
nb new "Example note content."

# create a new note with the title "Example Note Title"
nb create --title "Example Note Title"
Listing Notes
To list notes and notebooks, run nb ls:
> nb ls
home
----
[3] example.md · "Example content."
[2] todos.md · "Todos:"
[1] ideas.md · "- Example idea one."
Notebooks are listed above the line, with the current notebook
highlighted and/or underlined, depending on terminal capabilities.
nb ls also includes a footer with example commands for easy reference.
The notebook header and command footer can be configured or hidden with
nb set header and
nb set footer.
Notes from the current notebook are listed in the order they were last
modified. By default, each note is listed with its id, filename, and an
excerpt from the first line of the note. When a note has a title, the
title is displayed instead of the filename and first line.
Titles can be defined within a note using
either Markdown h1 style
or YAML front matter:
# Example Title
Todos
=====
---
title: Ideas
---
Once defined, titles will be displayed in place of the filename and first line
in the output of nb ls:
> nb ls
home
----
[3] Example Title
[2] Todos
[1] Ideas
Pass an id, filename, or title to view the listing for that note:
> nb ls Todos
[2] Todos
> nb ls 3
[3] Example Title
If there is no immediate match, nb will list items with titles and
filenames that fuzzy match the query:
> nb ls "idea"
[1] Ideas
A case-insensitive regular expression can also be used to filter
filenames and titles:
> nb ls "^example.*"
[3] Example Title
Multiple words act like an OR filter, listing any titles or filenames that
match any of the words:
> nb ls example ideas
[3] Example Title
[1] Ideas
When multiple words are quoted, filter titles and filenames for that phrase:
> nb ls "example title"
[3] Example Title
For full text search, see Search.
To view excerpts of notes, use the --excerpt or -e option, which
optionally accepts a length:
> nb ls 3 --excerpt
[3] Example Title
-----------------
# Example Title

This is an example excerpt.

> nb ls 3 -e 8
[3] Example Title
-----------------
# Example Title

This is an example excerpt.

More example content:
- one
- two
- three
Several classes of file types are represented with emoji to make them
easily identifiable in lists. For example, bookmarks and encrypted notes
are listed with 🔖 and 🔒:
> nb ls
home
----
[4] Example Note
[3] 🔒 encrypted-note.md.enc
[2] 🔖 Example Bookmark (example.com)
[1] 🔖 🔒 encrypted.bookmark.md.enc
File types include:
 🔉  Audio
 📖  Book
 🔖  Bookmark
 🔒  Encrypted
 📂  Folder
 🌄  Image
 📄  PDF, Word, or Open Office document
 📹  Video
By default, items are listed starting with the most recently modified.
To reverse the order, use the -r or --reverse flag:
> nb ls
home
----
[2] Todos
[3] Example Title
[1] Ideas

> nb ls --reverse
[1] Ideas
[3] Example Title
[2] Todos
Notes can be sorted with the -s / --sort flag, which can be combined
with -r / --reverse:
> nb ls
home
----
[2] Todos
[3] Example Title
[1] Ideas

> nb ls --sort
[1] Ideas
[2] Todos
[3] Example Title

> nb ls --sort --reverse
[3] Example Title
[2] Todos
[1] Ideas
nb with no subcommand behaves like an alias for nb ls, so the examples
above can be run without the ls:
> nb
home
----
[2] Todos
[3] Example Title
[1] Ideas

> nb "^example.*"
[3] Example Title

> nb 3 --excerpt
[3] Example Title
-----------------
# Example Title

This is an example excerpt.

> nb 3 -e 8
[3] Example Title
-----------------
# Example Title

This is an example excerpt.

More example content:
- one
- two
- three

> nb --sort
[1] Ideas
[2] Todos
[3] Example Title

> nb --sort --reverse
[3] Example Title
[2] Todos
[1] Ideas
Short options can be combined for brevity:
# equivalent to `nb --sort --reverse --excerpt 2` and `nb -s -r -e 2`:
> nb -sre 2
[3] Example Title
-----------------
# Example Title

[2] Todos
---------
Todos
=====
[1] Ideas
---------
---
title: Ideas
nb and nb ls display the 20 most recently modified items. The default
limit can be changed with nb set limit <number>.
To list a different number of items on a per-command basis, use the
-n <limit>, --limit <limit>, --<limit>, -a, or --all flags:
> nb -n 1
home
----
[5] Example Five
4 omitted. 5 total.

> nb --limit 2
home
----
[5] Example Five
[4] Example Four
3 omitted. 5 total.

> nb --3
home
----
[5] Example Five
[4] Example Four
[3] Example Three
2 omitted. 5 total.

> nb --all
home
----
[5] Example Five
[4] Example Four
[3] Example Three
[2] Example Two
[1] Example One
nb ls is a combination of nb notebooks and nb list
in one view and accepts the same arguments as nb list, which lists only
notes without the notebook list and with no limit by default:
> nb list
[100] Example One Hundred
[99]  Example Ninety-Nine
[98]  Example Ninety-Eight
... lists all notes ...
[2]   Example Two
[1]   Example One
For more information about options for listing notes, run nb help ls
and nb help list.
Editing Notes
You can edit a note in your editor by passing its id, filename, or title
to nb edit:
# edit note by id
nb edit 3

# edit note by filename
nb edit example.md

# edit note by title
nb edit "A Document Title"

# edit note 12 in the notebook named "example"
nb edit example:12

# edit note 12 in the notebook named "example", alternative
nb example:12 edit

# edit note 12 in the notebook named "example", alternative
nb example:edit 12
edit and other subcommands that take an identifier can be called with the
identifier and subcommand name reversed:
# edit note by id
nb 3 edit
nb edit can also receive piped content, which it will append to the
specified note without opening the editor:
echo "Content to append.", nb edit 1
Content can be passed with the --content option, which will also
append the content without opening the editor:
nb edit 1 --content "Content to append."
When content is piped or specified with --content, use the --edit
flag to open the file in the editor before the change is committed.
Editing Encrypted Notes
When a note is encrypted, nb edit will prompt you for the note password,
open the unencrypted content in your editor, and then automatically reencrypt
the note when you are done editing.
Shortcut Alias: e
Like add, edit has a shortcut alias, e:
# edit note by id
nb e 3

# edit note by filename
nb e example.md

# edit note by title
nb e "A Document Title"

# edit note by id, alternative
nb 3 e

# edit note 12 in the notebook named "example"
nb e example:12

# edit note 12 in the notebook named "example", alternative
nb example:12 e

# edit note 12 in the notebook named "example", alternative
nb example:e 12
For nb edit help information, run nb help edit.
Viewing Notes
Notes can be viewed using nb show:
# show note by id
nb show 3

# show note by filename
nb show example.md

# show note by title
nb show "A Document Title"

# show note by id, alternative
nb 3 show

# show note 12 in the notebook named "example"
nb show example:12

# show note 12 in the notebook named "example", alternative
nb example:12 show

# show note 12 in the notebook named "example", alternative
nb example:show 12
By default, nb show will open the note in
less, with syntax highlighting if
bat,
highlight,
or
Pygments
is installed. You can navigate in less using the following keys:
Key               Function
---               --------
mouse scroll      Scroll up or down
arrow up or down  Scroll one line up or down
f                 Jump forward one window
b                 Jump back one window
d                 Jump down one half window
u                 Jump up one half window
/<query>          Search for <query>
n                 Jump to next <query> match
q                 Quit
If less scrolling isn't working in iTerm2,
go to "Settings" -> "Advanced" -> "Scroll wheel sends arrow keys when in
alternate screen mode" and change it to "Yes".
More info
When Pandoc is available, use the -r / --render
option to render the note to HTML and open it in your terminal browser:
nb show example.md --render
# opens example.md as an HTML page in w3m or lynx
nb show also supports previewing other file types in the terminal,
depending on the tools available in the environment. Supported file types and
tools include:
- PDF files:
termpdf.py
with kittypdftotext
- Audio files:
- Images:
- ImageMagick with a terminal that
supports sixels imgcatwith
iTerm2- kitty's
icatkitten
- ImageMagick with a terminal that
- Folders / Directories:
- Word Documents:
- EPUB ebooks:
When using nb show with other file types or if the above tools are not
available, nb show will open files in your system's preferred application
for each type.
nb show also provides options for querying information about an
item. For example, use the --added / -a and --updated / -u flags to
print the date and time that an item was added or updated:
> nb show 2 --added
2020-01-01 01:01:00 -0700

> nb show 2 --updated
2020-02-02 02:02:00 -0700
nb show is primarily intended for viewing items within the terminal.
To view a file in the system's preferred GUI application,
use nb open.
For full nb show usage information, run nb help show.
Shortcut Alias: s
show is aliased to s:
# show note by id
nb s 3

# show note by filename
nb s example.md

# show note by title
nb s "A Document Title"

# show note by id, alternative
nb 3 s

# show note 12 in the notebook named "example"
nb s example:12

# show note 12 in the notebook named "example", alternative
nb example:12 s

# show note 12 in the notebook named "example", alternative
nb example:s 12
Alias: view
nb show can also be invoked with nb view for convenience:
# show note by id
nb view 3

# show note by filename
nb view example.md

# show note by title
nb view "A Document Title"

# show note by id, alternative
nb 3 view
Deleting Notes
To delete a note, pass its id, filename, or title to
nb delete:
# delete note by id
nb delete 3

# delete note by filename
nb delete example.md

# delete note by title
nb delete "A Document Title"

# delete note by id, alternative
nb 3 delete

# delete note 12 in the notebook named "example"
nb delete example:12

# delete note 12 in the notebook named "example", alternative
nb example:12 delete

# show note 12 in the notebook named "example", alternative
nb example:delete 12
By default, nb delete will display a confirmation prompt. To skip, use the
--force / -f option:
nb delete 3 --force
Shortcut Alias: d
delete has the alias d:
# delete note by id
nb d 3

# delete note by filename
nb d example.md

# delete note by title
nb d "A Document Title"

# delete note by id, alternative
nb 3 d

# delete note 12 in the notebook named "example"
nb d example:12

# delete note 12 in the notebook named "example", alternative
nb example:12 d

# delete note 12 in the notebook named "example", alternative
nb example:d 12
For nb delete help information, run nb help delete.
🔖 Bookmarks
nb is a powerful bookmark management system, enabling you to to view, search,
and manage your bookmarks, links, and online references. Bookmarks are
Markdown notes containing information about the bookmarked page.
To create a new bookmark pass a URL as the first argument to nb:
nb https://example.com
nb automatically generates a bookmark using information from the page:
# Example Title (example.com)

<https://example.com>

## Description

Example description.

## Content

Example Title
=============

This domain is for use in illustrative examples in documents. You may
use this domain in literature without prior coordination or asking for
permission.

[More information\...](https://www.iana.org/domains/example)
nb embeds the page content in the bookmark, making it available for full
text search with nb search. When Pandoc
is installed, the HTML page content will be converted to Markdown. When
readability-cli is
installed, markup is cleaned up to focus on content.
In addition to caching the page content, you can also include a quote from
the page using the -q / --quote option:
nb https://example.com --quote "Example quote line one.

Example quote line two."
# Example Title (example.com)

<https://example.com>

## Description

Example description.

## Quote

> Example quote line one.
>
> Example quote line two.

## Content

Example Title
=============

This domain is for use in illustrative examples in documents. You may
use this domain in literature without prior coordination or asking for
permission.

[More information\...](https://www.iana.org/domains/example)
Add a comment to a bookmark using the -c / --comment option:
nb https://example.com --comment "Example comment."
# Example Title (example.com)

<https://example.com>

## Description

Example description.

## Comment

Example comment.

## Content

Example Title
=============

This domain is for use in illustrative examples in documents. You may
use this domain in literature without prior coordination or asking for
permission.

[More information\...](https://www.iana.org/domains/example)
Bookmarks can be tagged using the -t / --tags option. Tags are converted
into hashtags:
nb https://example.com --tags tag1,tag2
# Example Title (example.com)

<https://example.com>

## Description

Example description.

## Tags

#tag1 #tag2

## Content

Example Title
=============

This domain is for use in illustrative examples in documents. You may
use this domain in literature without prior coordination or asking for
permission.

[More information\...](https://www.iana.org/domains/example)
Search for tagged bookmarks with nb search / nb q:
nb search "#tag1"

nb q "#tag"
nb search / nb q automatically searches archived page content:
> nb q "example query"
[10] 🔖 example.bookmark.md "Example Bookmark (example.com)"
---------------------------------------------------------
5:Lorem ipsum example query.
Bookmarks can also be encrypted:
# create a new password-protected, encrypted bookmark
nb https://example.com --encrypt
Encrypted bookmarks require a password before they can be viewed or
opened.
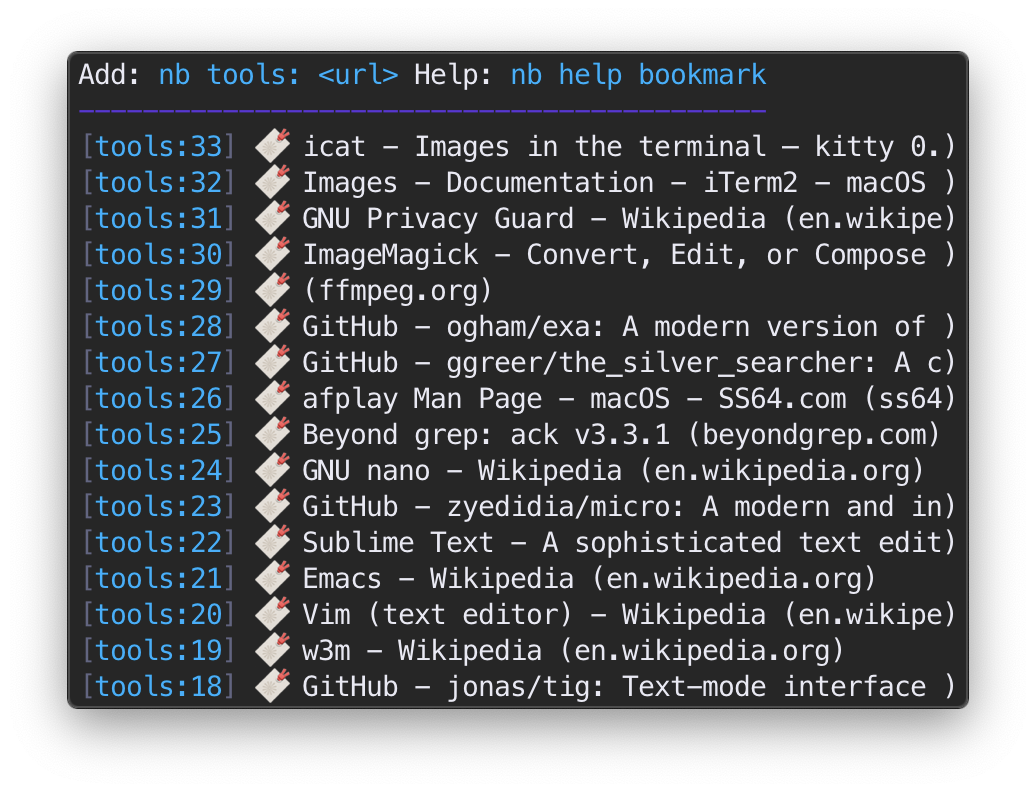
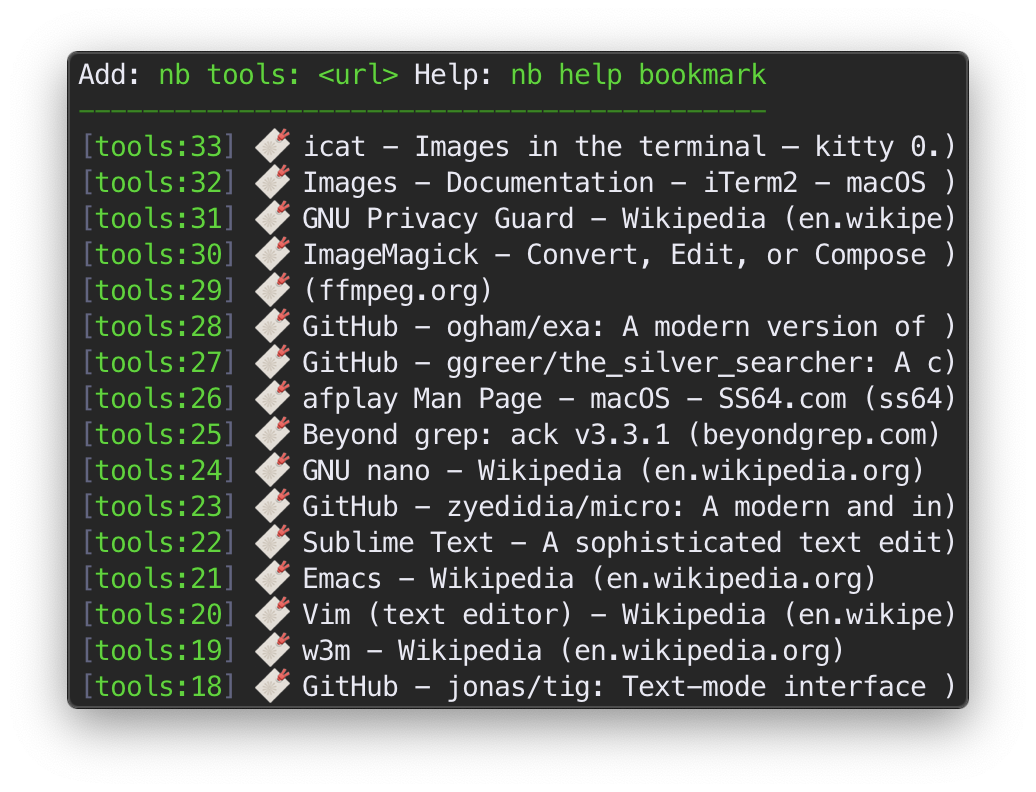
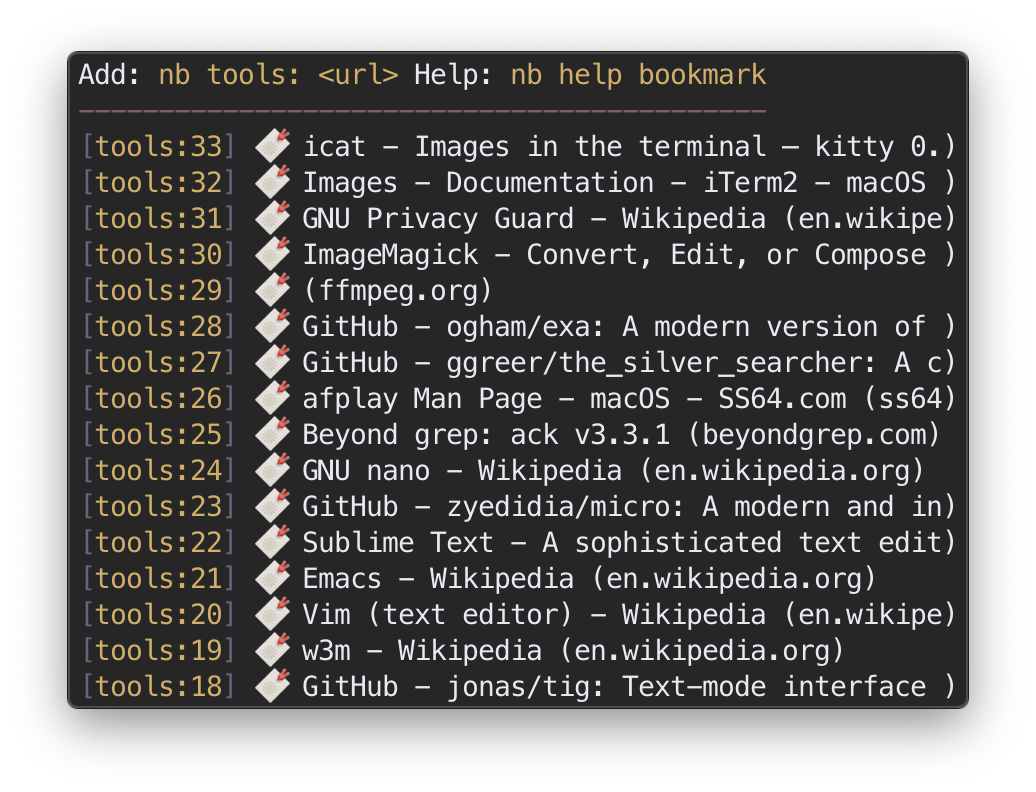
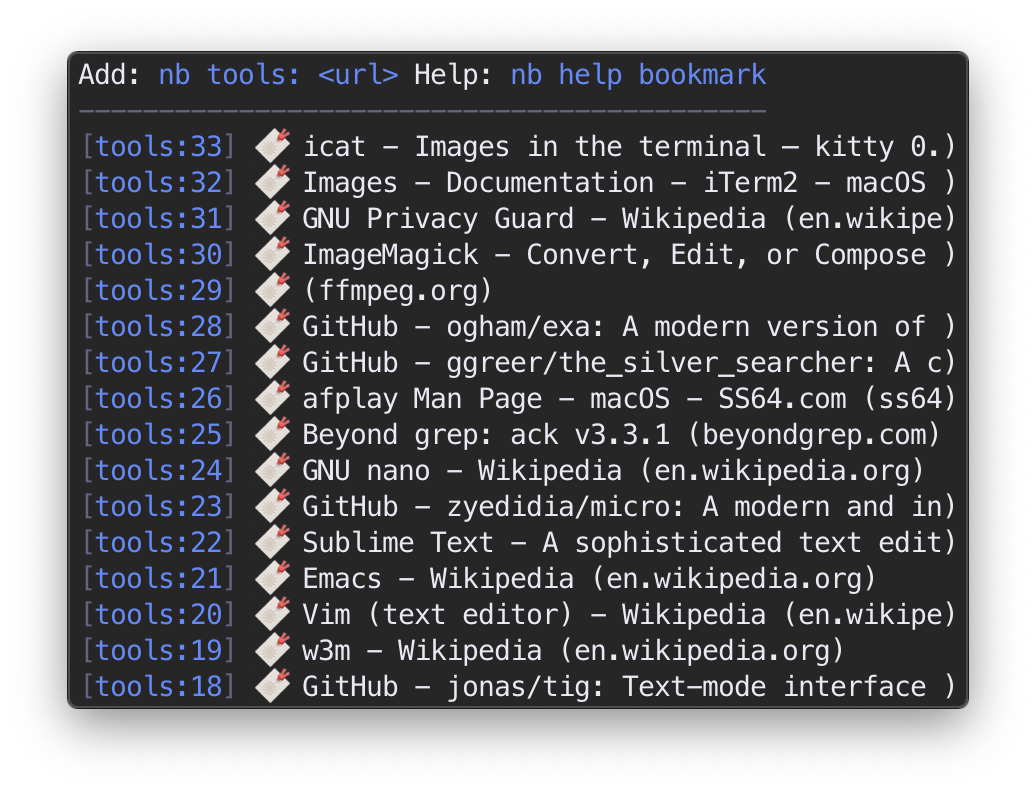
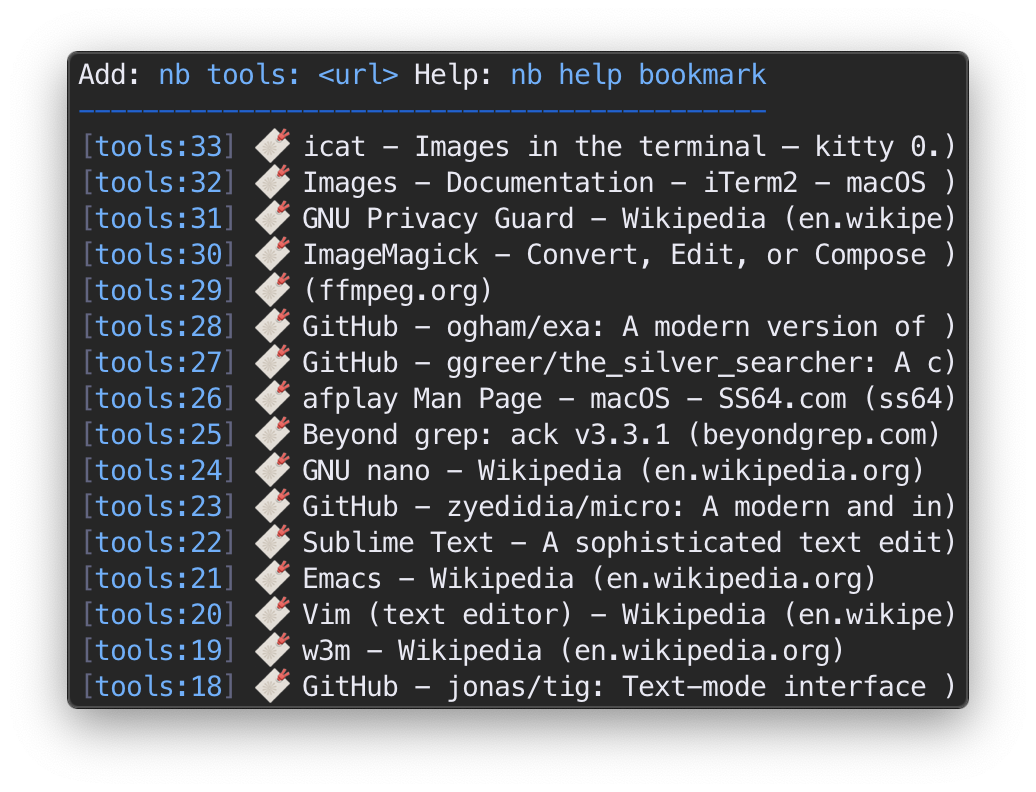
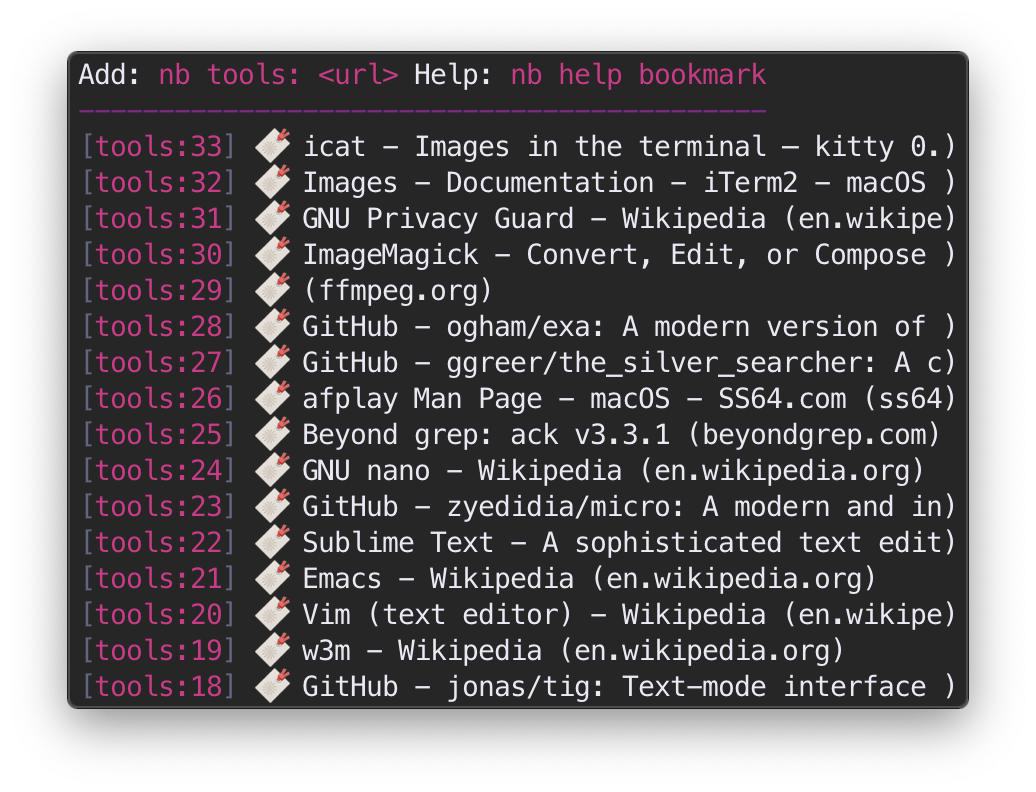
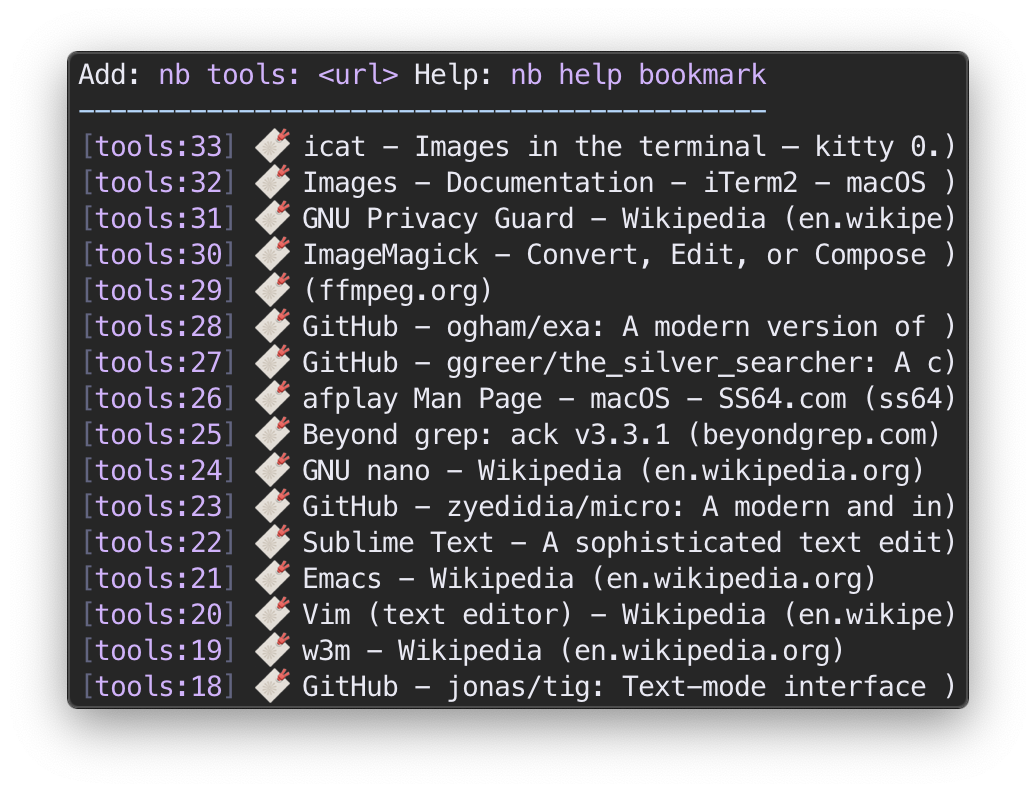
Listing and Filtering Bookmarks
nb bookmark and nb bookmark list can be used to list
and filter only bookmarks:
> nb bookmark
Add: nb <url> Help: nb help bookmark
------------------------------------
[3] 🔖 🔒 example.bookmark.md.enc
[2] 🔖 Example Two (example.com)
[1] 🔖 Example One (example.com)

> nb bookmark list two
[2] 🔖 Example Two (example.com)
Bookmarks are also included in nb, nb ls, and nb list:
> nb
home
----
[7] 🔖 Example Bookmark Three (example.com)
[6] Example Note Three
[5] 🔖 Example Bookmark Two (example.net)
[4] Example Note Two
[3] 🔖 🔒 example-encrypted.bookmark.md.enc
[2] Example Note One
[1] 🔖 Example Bookmark One (example.com)
Use the --type <type> / --<type> option as a filter to display
only bookmarks:
> nb --type bookmark
[7] 🔖 Example Bookmark Three (example.com)
[5] 🔖 Example Bookmark Two (example.net)
[3] 🔖 🔒 example-encrypted.bookmark.md.enc
[1] 🔖 Example Bookmark One (example.com)

> nb --bookmark
[7] 🔖 Example Bookmark Three (example.com)
[5] 🔖 Example Bookmark Two (example.net)
[3] 🔖 🔒 example-encrypted.bookmark.md.enc
[1] 🔖 Example Bookmark One (example.com)
nb saves the domain in the title, making it easy to filter by domain
using any list subcommands:
> nb example.com
[7] 🔖 Example Bookmark Three (example.com)
[1] 🔖 Example Bookmark One (example.com)
For more listing options, see nb help ls, nb help list,
and nb help bookmark.
Shortcut Alias: b
bookmark can also be used with the alias b:
> nb b
Add: nb <url> Help: nb help bookmark
------------------------------------
[7] 🔖 Example Bookmark Three (example.com)
[5] 🔖 Example Bookmark Two (example.net)
[3] 🔖 🔒 example-encrypted.bookmark.md.enc
[1] 🔖 Example Bookmark One (example.com)

> nb b example.net
[5] 🔖 Example Bookmark Two (example.net)
Opening and Viewing Bookmarked Pages
nb provides multiple ways to view bookmarked web pages.
nb open opens the bookmarked page in your
system's primary web browser:
# open bookmark by id
nb open 3

# open bookmark 12 in the notebook named "example"
nb open example:12

# open bookmark 12 in the notebook named "example", alternative
nb example:12 open

# open bookmark 12 in the notebook named "example", alternative
nb example:open 12
nb peek (alias: preview) opens the bookmarked page
in your terminal web browser, such as
w3m or
Lynx:
# peek bookmark by id
nb peek 3

# peek bookmark 12 in the notebook named "example"
nb peek example:12

# peek bookmark 12 in the notebook named "example", alternative
nb example:12 peek

# peek bookmark 12 in the notebook named "example", alternative
nb example:peek 12
open and peek subcommands also work seamlessly with encrypted bookmarks.
nb will simply prompt you for the bookmark's password.
open and peek automatically check whether the URL is still valid.
If the page has been removed, nb can check the Internet Archive
Wayback Machine for an archived copy.
The preferred terminal web browser can be set using the $BROWSER
environment variable, assigned in ~/.bashrc, ~/.zshrc, or similar:
export BROWSER=lynx
When $BROWSER is not set, nb looks for w3m and lynx and uses the
first one it finds.
$BROWSER can also be used to easy specify the terminal browser for an
individual command:
> BROWSER=lynx nb 12 peek
# opens the URL from bookmark 12 in lynx

> BROWSER=w3m nb 12 peek
# opens the URL from bookmark 12 in w3m
nb show and nb edit can also be used to view and edit bookmark files,
which include the cached page converted to Markdown.
nb show <id> --render / nb show <id> -r displays the bookmark file
converted to HTML in the terminal web browser, including all bookmark fields
and the cached page content, providing a cleaned-up, distraction-free,
locally-served view of the page content along with all of your notes.
Shortcut Aliases: o and p
open and peek can also be used with the shortcut aliases o and
p:
# open bookmark by id
nb o 3

# open bookmark 12 in the notebook named "example"
nb o example:12

# open bookmark 12 in the notebook named "example", alternative
nb example:12 o

# peek bookmark by id
nb p 3

# peek bookmark 12 in the notebook named "example"
nb p example:12

# peek bookmark 12 in the notebook named "example", alternative
nb example:12 p
Bookmark File Format
Bookmarks are identified by a .bookmark.md file extension. The
bookmark URL is the first URL in the file within < and > characters.
To create a minimally valid bookmark file with nb add:
nb add example.bookmark.md --content "<https://example.com>"
For a full overview, see
nb Markdown Bookmark File Format.
bookmark -- A command line tool for managing bookmarks.
nb includes bookmark, a full-featured command line
interface for creating, viewing, searching, and editing bookmarks.
bookmark is a shortcut for the nb bookmark subcommand, accepting all
of the same subcommands and options with identical behavior.
Bookmark a page:
> bookmark https://example.com --tags tag1,tag2
Added: [3] 🔖 20200101000000.bookmark.md "Example Title (example.com)"
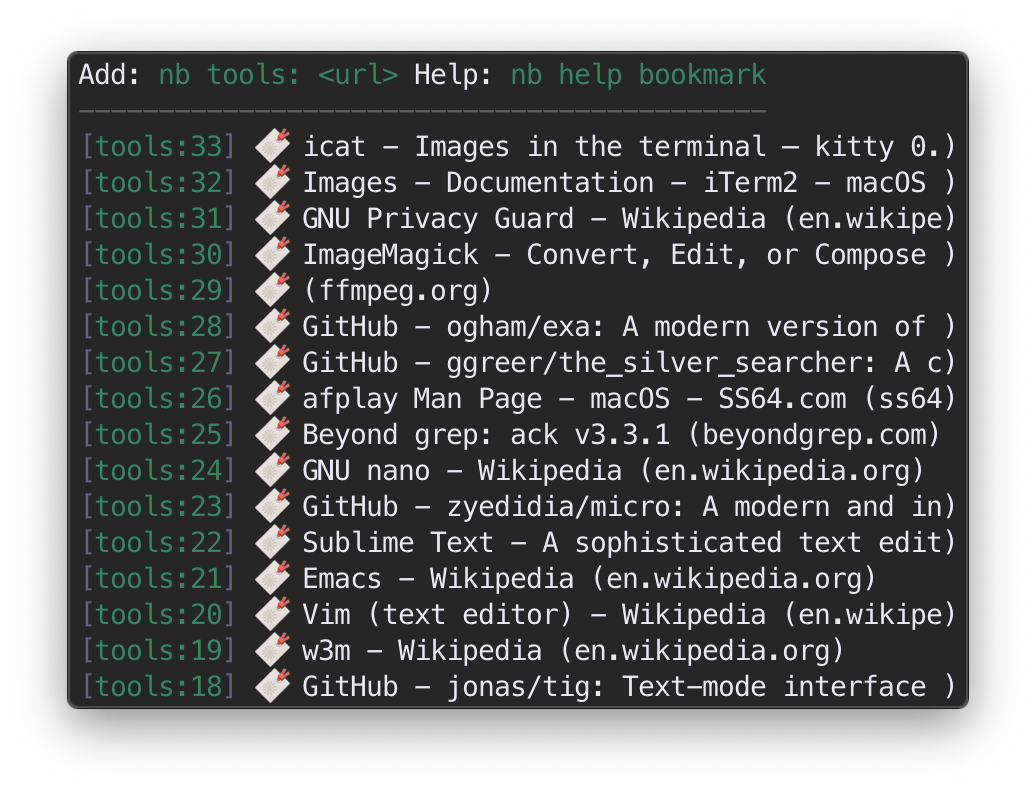
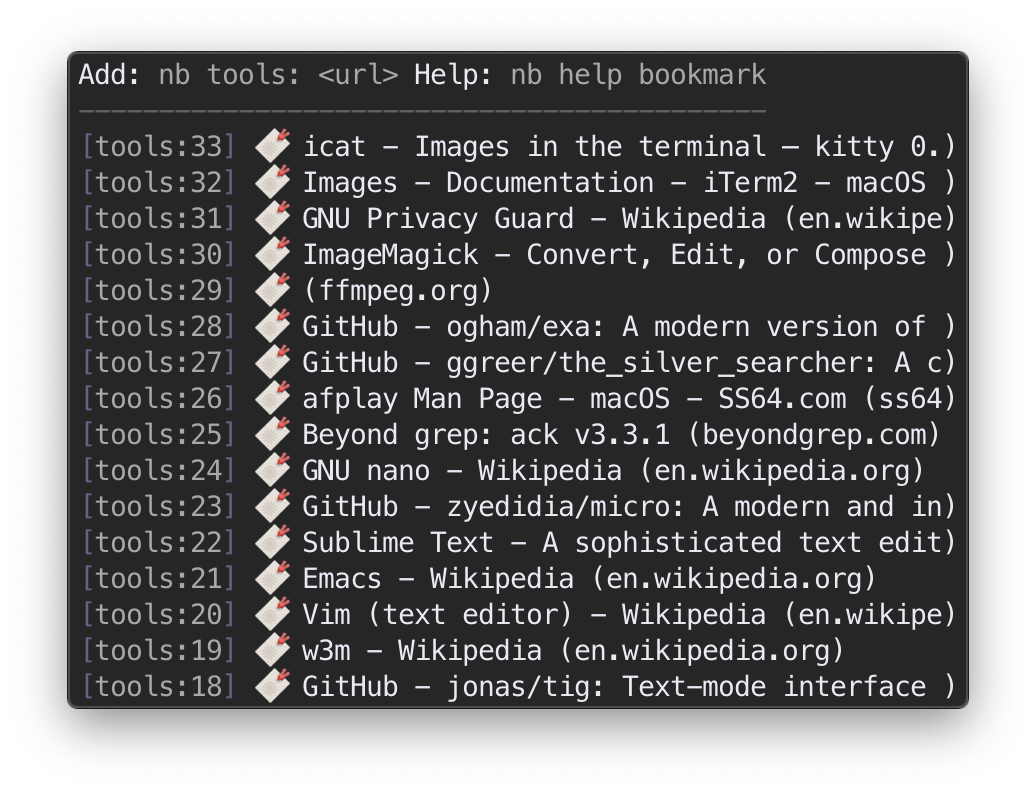
List and filter bookmarks with bookmark and bookmark list:
> bookmark
Add: bookmark <url> Help: bookmark help
---------------------------------------
[3] 🔖 🔒 example.bookmark.md.enc
[2] 🔖 Example Two (example.com)
[1] 🔖 Example One (example.com)

> bookmark list two
[2] 🔖 Example Two (example.com)
View a bookmark in your terminal web browser:
> bookmark peek 2
Open a bookmark in your system's primary web browser:
> bookmark open 2
Perform a full text search of bookmarks and archived page content:
> bookmark search "example query"
[10] 🔖 example.bookmark.md "Example Bookmark (example.com)"
---------------------------------------------------------
5:Lorem ipsum example query.
See bookmark help for more information.
🔍 Search
Use nb search to search your notes, with support for
regular expressions and tags:
# search current notebook for "example query"
nb search "example query"

# search the notebook "example" for "example query"
nb example:search "example query"

# search all unarchived notebooks for "example query" and list matching items
nb search "example query" --all --list

# search for "Example" OR "Sample"
nb search "Example, Sample"

# search items containing the hashtag "#example"
nb search "#example"

# search with a regular expression
nb search "\d\d\d-\d\d\d\d"

# search bookmarks for "example"
nb search "example" --type bookmark

# search bookmarks for "example", alternative
nb b q "example"

# search the current notebook for "example query"
nb q "example query"

# search the notebook named "example" for "example query"
nb example:q "example query"

# search all unarchived notebooks for "example query" and list matching items
nb q -la "example query"
nb search prints the id number, filename, and title of each matched
file, followed by each search query match and its line number, with color
highlighting:
> nb search "example"
[314]  🔖 example.bookmark.md "Example Bookmark (example.com)"
----------------------------------------------------------
1:# Example Bookmark (example.com)

3:<https://example.com>

[2718] example.md "Example Note"
--------------------------------
1:# Example Note
To just print the note information line without the content matches, use
the -l or --list option:
> nb search "example" --list
[314]  🔖 example.bookmark.md "Example Bookmark (example.com)"
[2718] example.md "Example Note"
nb search looks for rg,
ag,
ack, and
grep, in that order, and
performs searches using the first tool it finds. nb search works
mostly the same regardless of which tool is found and is perfectly fine using
the environment's built-in grep. rg, ag, and ack are faster and there
are some subtle differences in color highlighting.
Shortcut Alias: q
search can also be used with the alias q (for "query"):
# search for "example" and print matching excerpts
nb q "example"

# search for "example" and list each matching file
nb q -l "example"

# search for "example" in all unarchived notebooks
nb q -a "example"

# search for "example" in the notbook named "sample"
nb sample:q "example"
For more information about search, see nb help search.
🗒 Revision History
Whenever a note is added, modified, or deleted, nb automatically commits
the change to git transparently in the background.
Use nb history to view the history of the notebook or an
individual note:
# show history for current notebook
nb history

# show history for note number 4
nb history 4

# show history for note with filename example.md
nb history example.md

# show history for note titled "Example"
nb history Example

# show history for the notebook named "example"
nb example:history

# show history for the notebook named "example", alternative
nb history example:

# show the history for note 12 in the notebook named "example"
nb history example:12
nb history uses git log by default and prefers
tig when available.
📚 Notebooks
You can create additional notebooks, each of which has its own version history.
Create a new notebook with nb notebooks add:
# add a notebook named example
nb notebooks add example
nb and nb ls list the available notebooks above the list of notes:
> nb
example · home
--------------
[3] Title Three
[2] Title Two
[1] Title One
Commands in nb run within the current notebook, and identifiers like id,
filename, and title refer to notes within the current notebook.
nb edit 3, for example, tells nb to edit note with id 3 within the
current notebook.
To switch to a different notebook, use nb use:
# switch to the notebook named "example"
nb use example
If you are in one notebook and you want to perform a command in a
different notebook without switching to it, add the notebook name with a
colon before the command name:
# add a new note in the notebook "example"
nb example:add

# add a new note in the notebook "example", shortcut alias
nb example:a

# show note 5 in the notebook "example"
nb example:show 5

# show note 5 in the notebook "example", shortcut alias
nb example:s 5

# edit note 12 in the notebook "example"
nb example:edit 12

# edit note 12 in the notebook "example", shortcut alias
nb example:e 12

# search for "example query" in the notebook "example"
nb example:search "example query"

# search for "example query" in the notebook "example", shortcut alias
nb example:q "example query"

# show the revision history of the notebook "example"
nb example:history
The notebook name with colon can also be used as a modifier to the id,
filename, or title:
# edit note 12 in the notebook "example"
nb edit example:12

# edit note 12 in the notebook "example", shortcut alias
nb e example:12

# edit note 12 in the notebook "example", alternative
nb example:12 edit

# edit note 12 in the notebook "example", alternative, shortcut alias
nb example:12 e

# show note titled "misc" in the notebook "example"
nb show example:misc

# show note titled "misc" in the notebook "example", shortcut alias
nb s example:misc

# delete note with filename "todos.md" in the notebook "example", alternative
nb example:todos.md delete

# delete note with filename "todos.md" in the notebook "example", alternative,
# shortcut alias
nb example:todos.md d
When a notebook name with colon is called without a subcommand, nb runs
nb ls in the specified notebook:
> nb example:
example · home
--------------
[example:3] Title Three
[example:2] Title Two
[example:1] Title One
A bookmark can be created in another notebook by specifying the notebook
name with colon, then a space, then the URL and bookmark options:
# create a new bookmark in a notebook named "sample"
> nb sample: https://example.com --tags tag1,tag2
Notes can also be moved between notebooks:
# move note 3 from the current notebook to "example"
nb move 3 example

# move note 5 in the notebook "example" to the notebook "sample"
nb move example:5 sample
Example Workflow
The flexibility of nb's argument handling makes it easy to build commands
step by step as items are listed, filtered, viewed, and edited, particularly
in combination with shell history:
# list items in the "example" notebook
> nb example:
example · home
--------------
[example:3] Title Three
[example:2] Title Two
[example:1] Title One

# filter list
> nb example: three
[example:3] Title Three

# view item
> nb example:3 show
# opens item in `less`

# edit item
> nb example:3 edit
# opens item in $EDITOR
Notebooks and Tab Completion
nb tab completion is optimized for frequently running
commands in various notebooks using the colon syntax, so installing the
completion scripts is recommended and makes working with notebooks easy,
fluid, and fun.
For example, listing the contents of a notebook is usually as simple as typing
the first two or three characters of the name, then press the <tab> key,
then press <enter>:
> nb exa<tab>
# completes to "example:"
> nb example:
example · home
--------------
[example:3] Title Three
[example:2] Title Two
[example:1] Title One
Scoped notebook commands are also available in tab completion:
> nb exa<tab>
# completes to "example:"
> nb example:hi<tab>
# completes to "example:history"
Notebooks, Tags, and Taxonomy
nb is optimized to work well with a bunch of notebooks, so notebooks are
a really good way to organize your notes and bookmarks by top-level topic.
Tags are searchable across notebooks and can be created ad hoc, making
notebooks and tags distinct and complementary organizational systems in nb.
Search for a tag in or across notebooks with
nb search / nb q:
# search for #tag in the current notebook
nb q "#tag"

# search for #tag in all notebooks
nb q "#tag" -a

# search for #tag in the "example" notebook
nb example:q "#tag"
Global and Local Notebooks
Global Notebooks
By default, all nb notebooks are global, making them always accessible in
the terminal regardless of the current working directory. Global notebooks are
stored in the directory configured in nb set nb_dir, which is
~/.nb by default.
Local Notebooks
nb also supports creating and working with local notebooks. Local
notebooks are notebooks that are anywhere on the system outside
of NB_DIR. Any folder can be an nb local notebook, which is just a normal
folder that has been initialized as a git repository and contains an nb
.index file. Initializing a folder as an nb local notebook is a very easy
way to add structured git versioning to any folder of documents and
other files.
When nb runs within a local notebook, the local notebook is set as the
current notebook:
> nb
local · example · home
----------------------
[3] Title Three
[2] Title Two
[1] Title One
A local notebook is always referred to by the name local and otherwise
behaves just like a global notebook whenever a command is run from within it:
# add a new note in the local notebook
nb add

# edit note 15 in the local notebook
nb edit 15

# move note titled "Todos" from the home notebook to the local notebook
nb move home:Todos local

# move note 1 from the local notebook to the home notebook
nb move 1 home

# search the local notebook for <query string>
nb search "query string"

# search the local notebook and all unarchived global notebooks for <query string>
nb search "query string" --all
Local notebooks can be created with nb notebooks init:
# initialize the current directory as a notebook
nb notebooks init

# create a new notebook at ~/example
nb notebooks init ~/example

# clone an existing notebook to ~/example
nb notebooks init ~/example https://github.com/example/example.git
Local notebooks can also be created by exporting a global notebook:
# export global notebook named "example" to "../path/to/destination"
nb notebooks export example ../path/to/destination

# alternative
nb export example ../path/to/destination
Local notebooks can also be imported, making them global:
# import notebook or folder at "../path/to/notebook"
nb notebooks import ../path/to/notebook

# alternative
nb import ../path/to/notebook
nb notebooks init and nb notebooks import can be used together to
easily turn any directory of existing files into a global nb notebook:
> ls
example-directory

> nb notebooks init example-directory
Initialized local notebook: /home/username/example-directory

> nb notebooks import example-directory
Imported notebook: example-directory

> nb notebooks
example-directory
home
Archiving Notebooks
Notebooks can be archived using nb notebooks archive:
# archive the current notebook
nb notebooks archive

# archive the notebook named "example"
nb notebooks archive example
When a notebook is archived it is not included in nb /
nb ls output, nb search --all, or tab completion,
nor synced automatically with nb sync --all.
> nb
example1 · example2 · example3 · [1 archived]
---------------------------------------------
[3] Title Three
[2] Title Two
[1] Title One
Archived notebooks can still be used individually using normal notebook
commands:
# switch the current notebook to the archived notebook "example"
nb use example

# run the `list` subcommand in the archived notebook "example"
nb example:list
Check a notebook's archival status with
nb notebooks status:
> nb notebooks status example
example is archived.
Use nb notebooks unarchive to unarchive a notebook:
# unarchive the current notebook
nb notebooks unarchive

# unarchive the notebook named "example"
nb notebooks unarchive example
For more information about working with notebooks, see
nb help notebooks.
For technical details about notebooks, see
nb Notebook Specification.
🔄 Git Sync
Each notebook can be synced with a remote git repository by setting the
remote URL using nb remote:
# set the current notebook's remote to a private GitHub repository
nb remote set https://github.com/example/example.git

# set the remote for the notebook named "example"
nb example:remote set https://github.com/example/example.git
Any notebook with a remote URL will sync automatically every time a command is
run in that notebook.
When you use nb on multiple systems, you can set a notebook on both
systems to the same remote and nb will keep everything in sync in the
background every time there's a change in that notebook.
Since each notebook has its own git history, you can have some notebooks
syncing with remotes while other notebooks are only available locally on that
system.
Many services provide free private git repositories, so git syncing with
nb is easy, free, and vendor-independent. You can also sync your notes
using Dropbox, Drive, Box, Syncthing, or another syncing tool by changing
your nb directory with nb set nb_dir <path>
and git syncing will still work simultaneously.
When you have an existing nb notebook in a git repository, simply
pass the URL to nb notebooks add and nb will clone
your existing notebook and start syncing changes automatically:
# create a new notebook named "example" cloned from a private GitLab repository
nb notebooks add example https://gitlab.com/example/example.git
Turn off syncing for a notebook by removing the remote:
# remove the remote from the current notebook
nb remote remove

# remove the remote from the notebook named "example"
nb example:remote remove
Automatic git syncing can be turned on or off with
nb set auto_sync.
To sync manually, use nb sync:
# manually sync the current notebook
nb sync

# manually sync the notebook named "example"
nb example:sync
To bypass nb syncing and run git commands directly within a
notebook, use nb git:
# run `git fetch` in the current notebook
nb git fetch origin

# run `git status` in the notebook named "example"
nb example:git status
Private Repositories and Git Credentials
Syncing with private repositories requires configuring git to not prompt
for credentials. For repositories cloned over HTTPS,
credentials can be cached with git
.
For repositories cloned over SSH,
keys can be added to the ssh-agent
.
Use nb sync within a notebook to determine whether your
configuration is working. If nb sync displays a password prompt,
then follow the instructions above to configure your credentials.
The password prompt can be used to authenticate, but nb does not
cache or otherwise handle git credentials in any way, so there will
likely be multiple password prompts during each sync if credentials
are not configured.
Sync Conflict Resolution
nb handles git operations automatically, so you shouldn't ever need
to use the git command line tool directly. nb merges changes when
syncing and handles conflicts using a couple different strategies.
When nb sync encounters a conflict in a text file and can't
cleanly merge overlapping local and remote changes, nb saves both
versions within the file separated by git conflict markers and prints a
message indicating which file(s) contain conflicting text.
Use nb edit to remove the conflict markers and delete any
unwanted text.
For example, in the following file, the second list item was changed on
two systems, and git has no way to determine which one we want to keep:
# Example Title

- List Item apple
<<<<<<< HEAD
- List Item apricot
=======
- List Item pluot
>>>>>>> 719od01... [nb] Commit
- List Item plum
The local change is between the lines starting with <<<<<<< and
=======, while the remote change is between the ======= and
>>>>>>> lines.
To resolve this conflict by keeping both items, simply edit the file
with nb edit and remove the lines starting with <<<<<<<, =======,
and >>>>>>>:
# Example Title

- List Item apple
- List Item apricot
- List Item pluot
- List Item plum
When nb encounters a conflict in a binary file, such as an encrypted
note, both versions of the file are saved in the notebook as individual
files, with --conflicted-copy appended to the filename of the version
from the remote. To resolve a conflicted copy of a binary file, compare
both versions and merge them manually, then delete the --conflicted-copy.
If you do encounter a conflict that nb says it can't merge at all,
nb git and nb run can be used to perform git and
shell operations within the notebook to resolve the conflict manually.
Please also open an issue
with any relevant details that could inform a strategy for handling any
such cases automatically.
↕️ Import / Export
Files of any type can be imported into a notebook using
nb import. nb edit and nb open will open
files in your system's default application for that file type.
# import an image file
nb import ~/Pictures/example.png

# open image in your default image viewer
nb open example.png

# import a .docx file
nb import ~/Documents/example.docx

# open .docx file in Word or your system's .docx viewer
nb open example.docx
Multiple filenames and globbing are supported:
# import all files and directories in the current directory
nb import ./*

# import all markdown files in the current directory
nb import ./*.md

# import example.md and sample.md in the current directory
nb import example.md sample.md
nb import can also download and import files directly from the web:
# import a PDF file from the web
nb import https://example.com/example.pdf
# Imported "https://example.com/example.pdf" to "example.pdf"

# open example.pdf in your system's PDF viewer
nb open example.pdf
Some imported file types have indicators to make them easier to identify in
lists:
> nb
home
----
[6] 📖 example-ebook.epub
[5] 🌄 example-picture.png
[4] 📄 example-document.docx
[3] 📹 example-video.mp4
[2] 🔉 example-audio.mp3
[1] 📂 Example Folder
Notes, bookmarks, and other files can be exported using nb export.
If Pandoc is installed, notes can be automatically
converted to any of the
formats supported by Pandoc.
By default, the output format is determined by the file extension:
# export a Markdown note to a .docx Microsoft Office Word document
nb export example.md /path/to/example.docx

# export a note titled "Movies" to an HTML web page.
nb export Movies /path/to/example.html
For more control over the pandoc options, use the
nb export pandoc subcommand:
# export note 42 as an epub with pandoc options
nb export pandoc 42 --from markdown_strict --to epub -o path/to/example.epub
nb export notebook and nb import notebook can be
used to export and import notebooks:
# export global notebook named "example" to "../path/to/destination"
nb export notebook example ../path/to/destination

# import notebook or folder at "../path/to/notebook"
nb import notebook ../path/to/notebook
nb export notebook and nb import notebook behave
like aliases for nb notebooks export and
nb notebooks import, and the subcommands can be used
interchangeably.
For more information about imported and exported notebooks, see
Global and Local Notebooks.
For nb import and nb export help information, see
nb help import and nb help export.
⚙️ set & Settings
nb set and nb settings open the settings
prompt, which provides an easy way to change your nb settings.
nb set
To update a setting in the prompt, enter the setting name or number,
then enter the new value, and nb will add the setting to your
~/.nbrc configuration file.
Example: editor
nb can be configured to use a specific command line editor using the
editor setting.
The settings prompt for a setting can be started by passing the setting
name or number to nb set:
> nb set editor
[6]  editor
     ------
     The command line text editor to use with `nb`.

     • Example Values:

         atom
         code
         emacs
         macdown
         mate
         micro
         nano
         pico
         subl
         vi
         vim

EDITOR is currently set to vim

Enter a new value, unset to set to the default value, or q to quit.
Value:
A setting can also be updated without the prompt by passing both the name
and value to nb set:
# set editor with setting name
> nb set editor code
EDITOR set to code

# set editor with setting number (6)
> nb set 6 code
EDITOR set to code

# set the color theme to blacklight
> nb set color_theme blacklight
NB_COLOR_THEME set to blacklight

# set the default `ls` limit to 10
> nb set limit 10
NB_LIMIT set to 10
Use nb settings get to print the value of a setting:
> nb settings get editor
code

> nb settings get 6
code
Use nb settings unset to unset a setting and revert to
the default:
> nb settings unset editor
EDITOR restored to the default: vim

> nb settings get editor
vim
nb set and nb settings are aliases that refer to the same subcommand, so
the two subcommand names can be used interchangably.
For more information about set and settings, see
nb help settings and
nb settings list --long.
🎨 Color Themes
nb uses color to highlight various interface elements, including ids, the
current notebook name, the shell prompt, and divider lines.
nb includes several built-in color themes and also supports user-defined
themes. The current color theme can be set using
nb set color_theme:
nb set color_theme
Built-in Color Themes
blacklight, 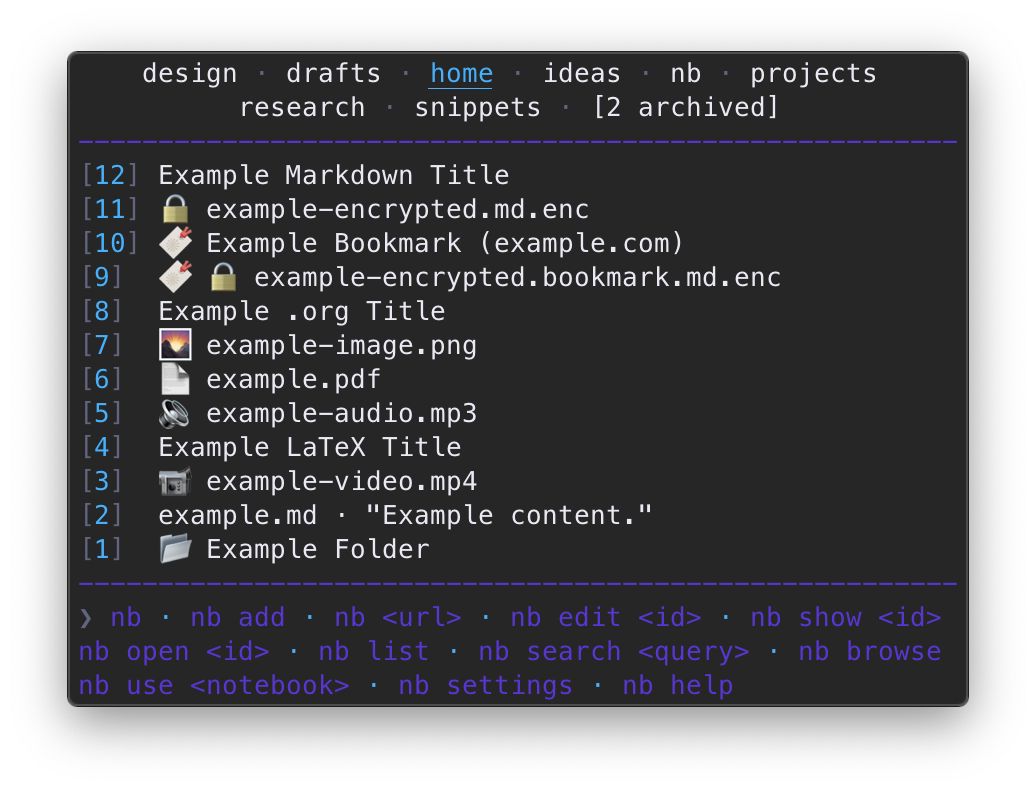 ,
,  , :--:, :--:, #####
 console, 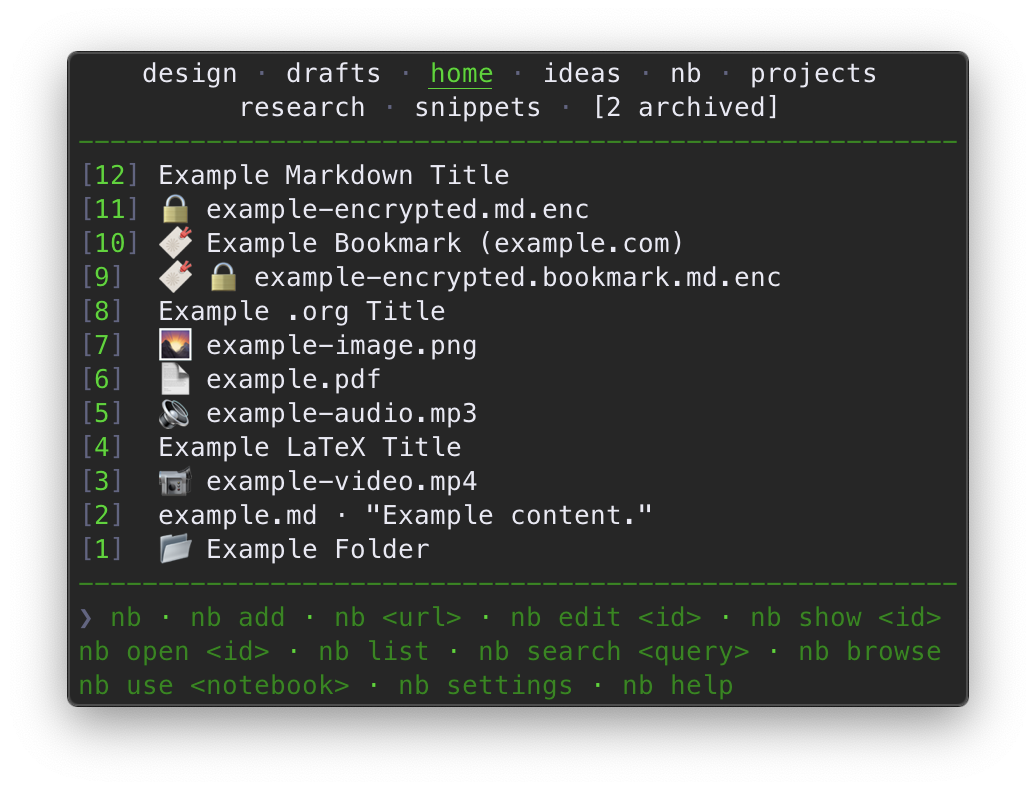 ,
,  , :--:, :--:, #####
 desert, 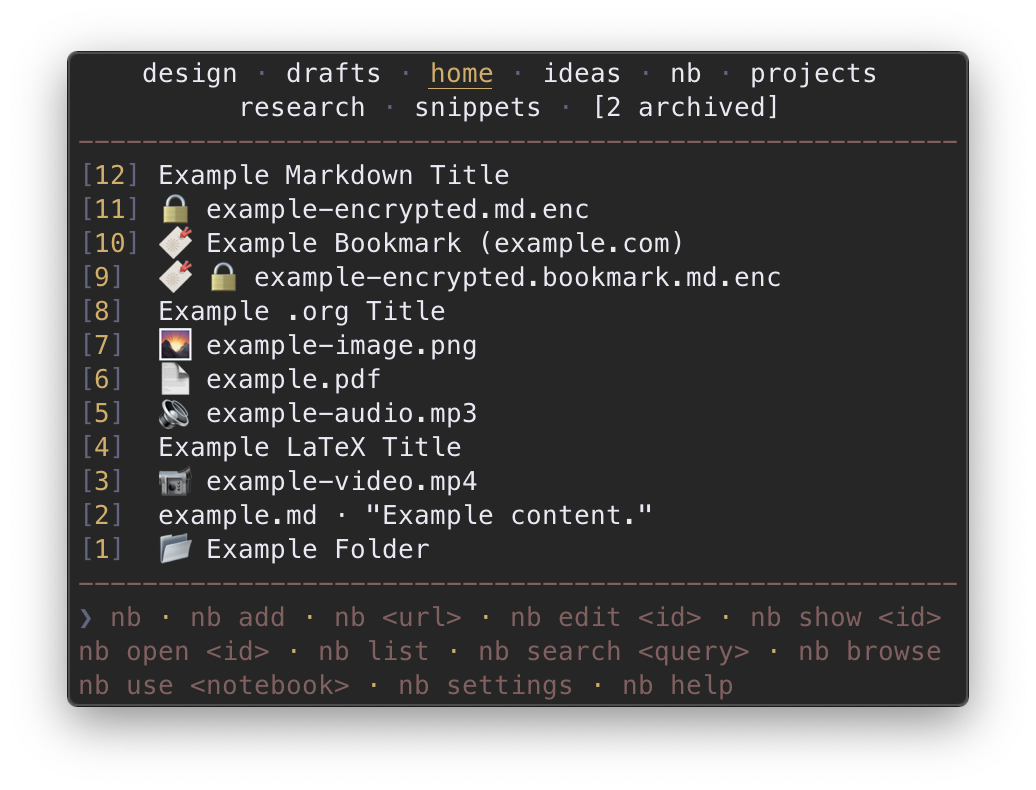 ,
,  , :--:, :--:, #####
 electro, 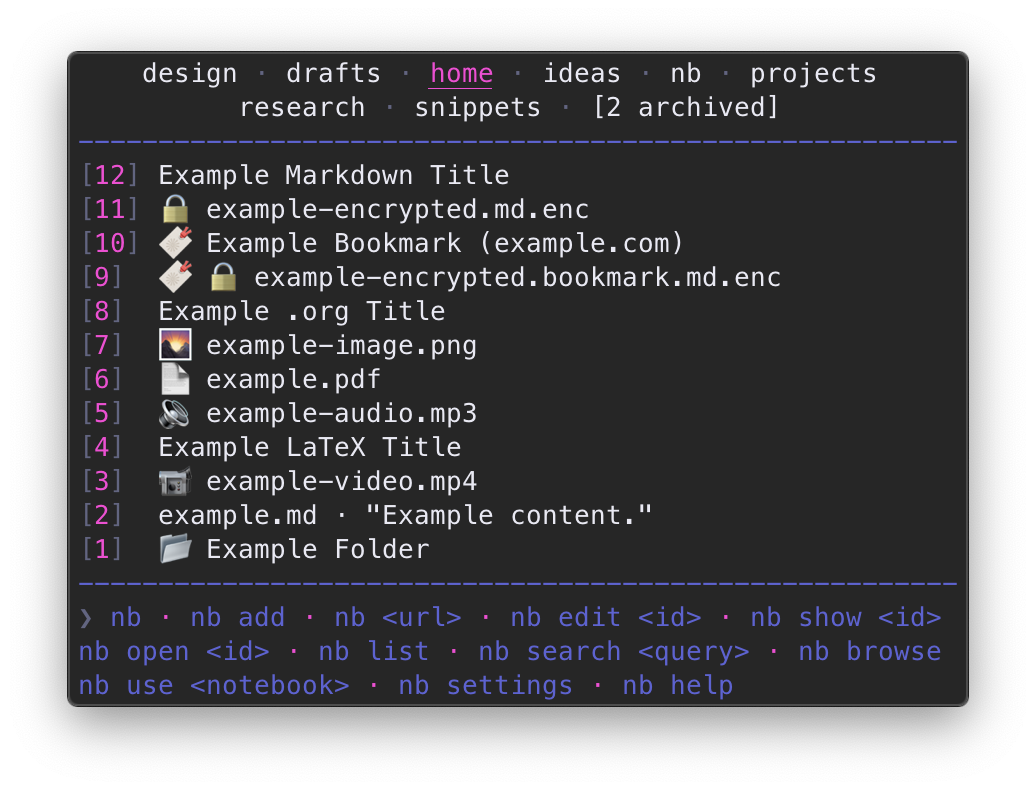 ,
,  , :--:, :--:, #####
 forest, 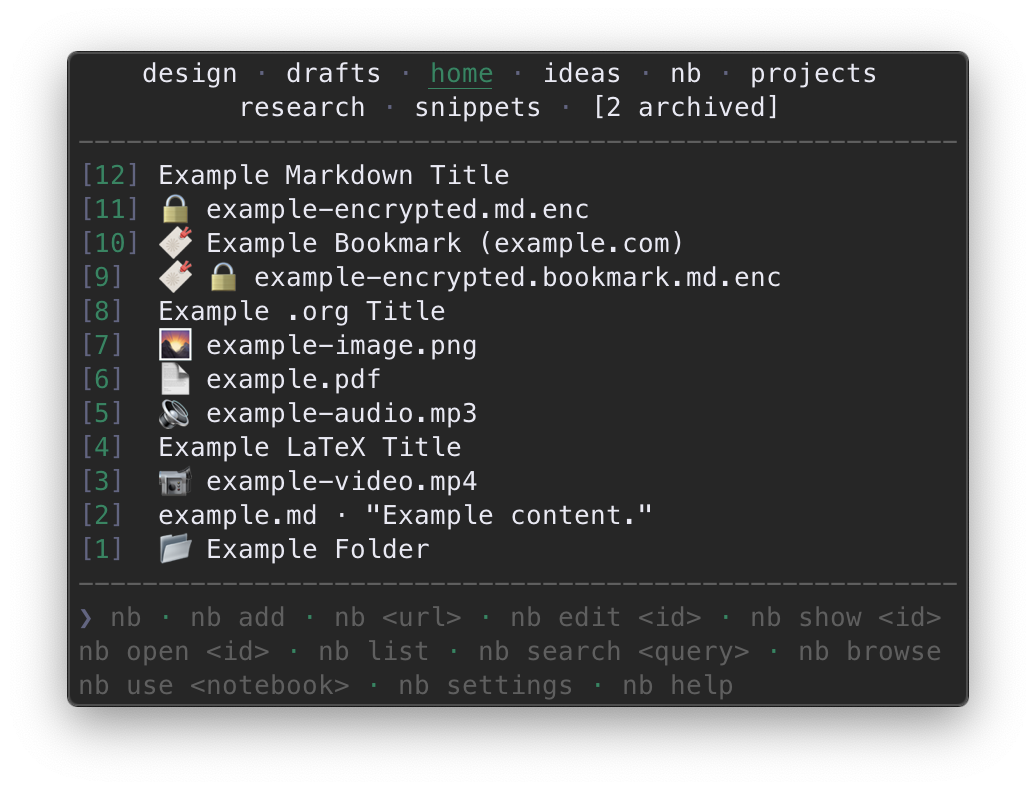 ,
,  , :--:, :--:, #####
 monochrome, 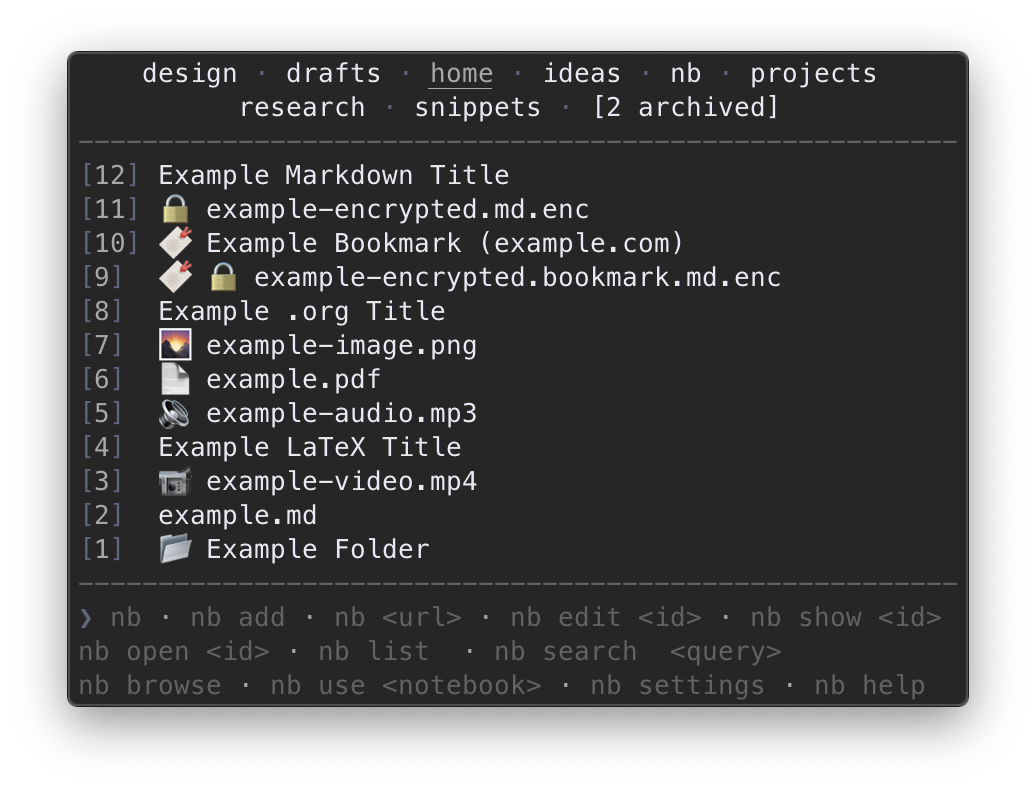 ,
,  , :--:, :--:, #####
 nb (default), 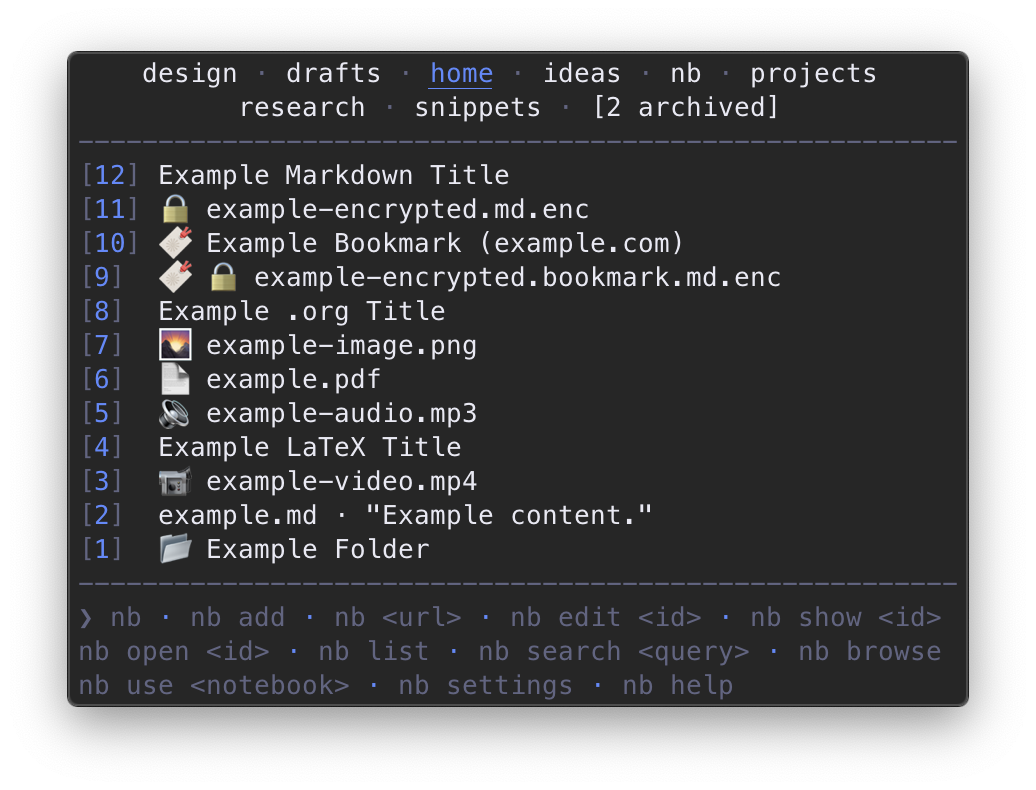 ,
,  , :--:, :--:, #####
 ocean, 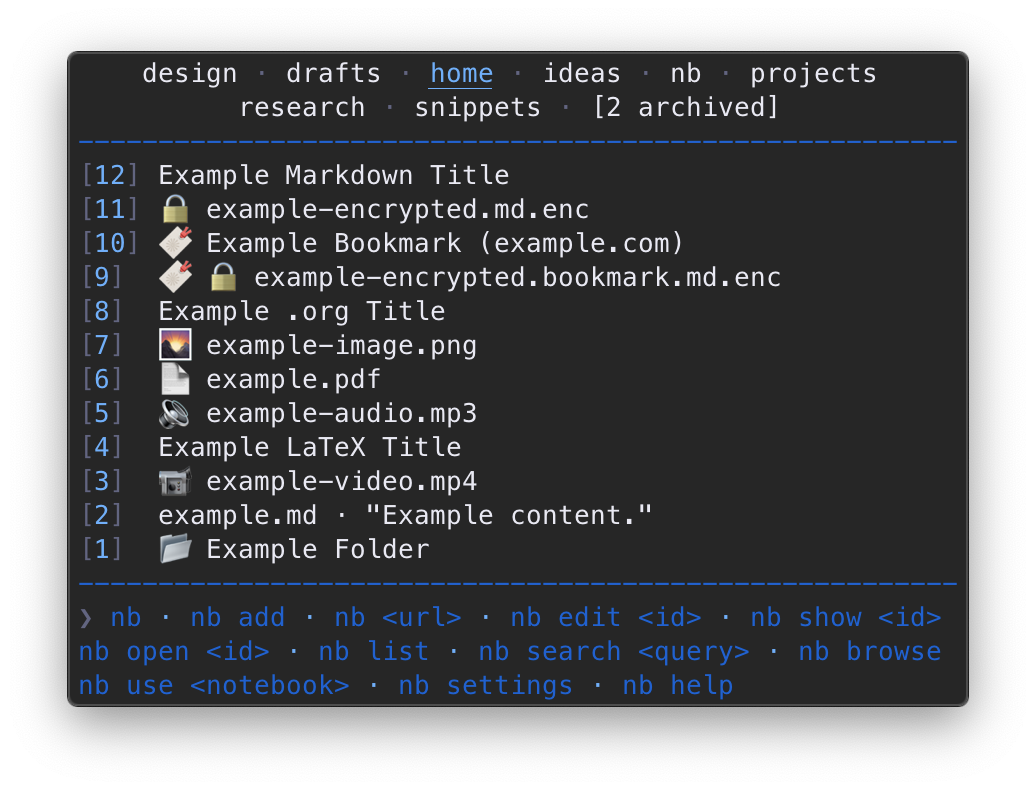 ,
,  , :--:, :--:, #####
 raspberry, 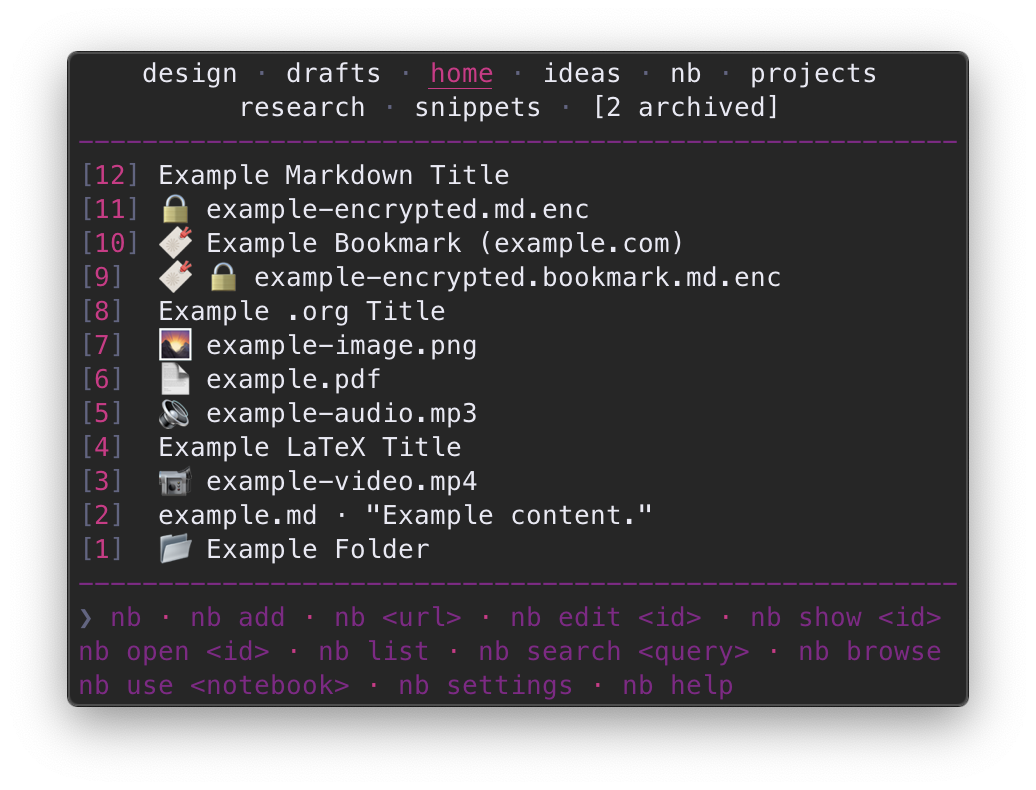 ,
,  , :--:, :--:, #####
 unicorn, 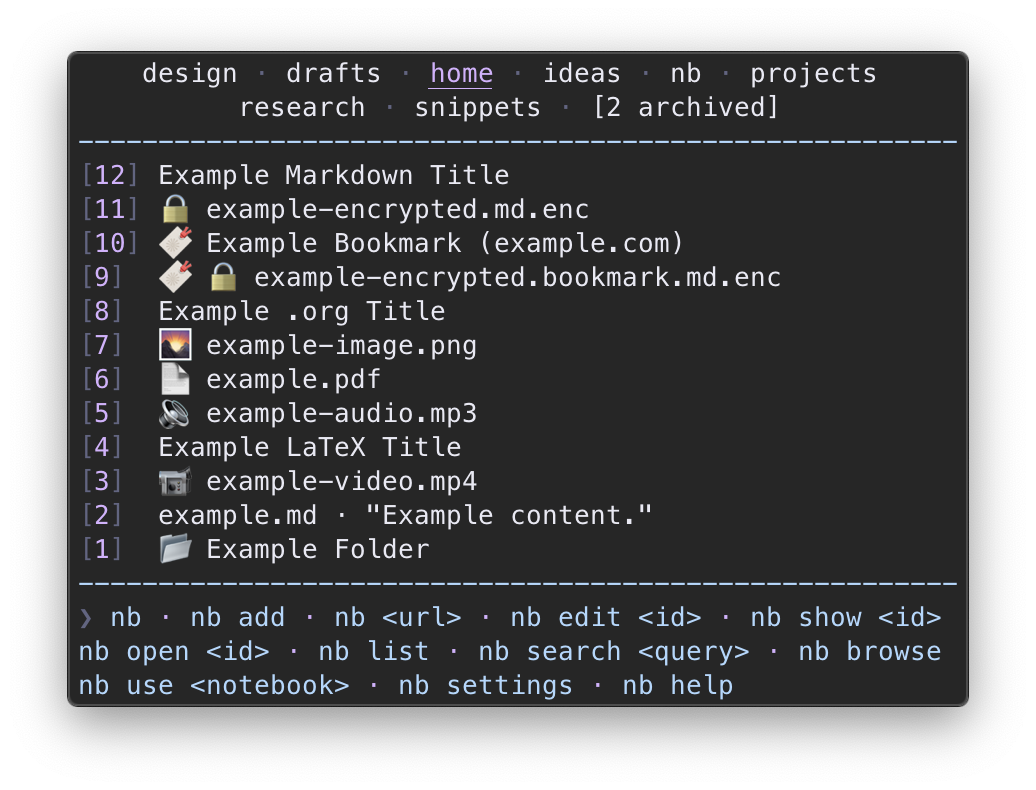 ,
,  , :--:, :--:, #####
 utility, 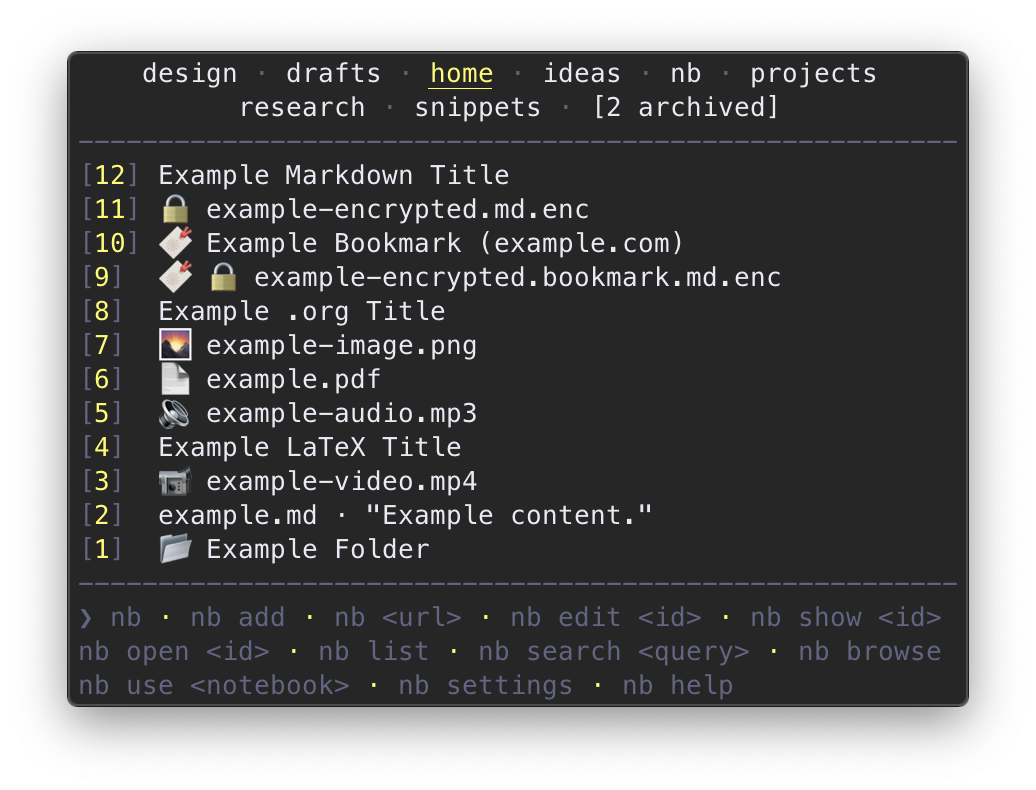 ,
,  , :--:, :--:, #### Custom Color Themes
Color themes are nb plugins with a .nb-theme file
extension and contain one if statement indicating the name and setting
the color environment variables to tput ANSI color numbers:
# turquoise.nb-theme
if
then
  export NB_COLOR_PRIMARY=43
  export NB_COLOR_SECONDARY=38
fi
View this theme as a complete file:
plugins/turquoise.nb-theme
Themes can be installed using nb plugins:
> nb plugins install https://github.com/xwmx/nb/blob/master/plugins/turquoise.nb-theme
Plugin installed:
/home/example/.nb/.plugins/turquoise.nb-theme
Once a theme is installed, use nb set color_theme to set it
as the current theme:
> nb set color_theme turquoise
NB_COLOR_THEME set to turquoise
The primary and secondary colors can also be overridden individually, making
color themes easily customizable:
# open the settings prompt for the primary color
nb set color_primary

# open the settings prompt for the secondary color
nb set color_secondary
To view a table of available colors and numbers, run:
nb set colors
Syntax Highlighting Theme
nb displays files with syntax highlighting when
bat,
highlight,
or
Pygments
is installed.
When bat is installed, syntax highlighting color themes are
available for both light and dark terminal backgrounds.
To view a list of available themes and set the syntax highlighting color
theme, use nb set syntax_theme.
$ Shell Theme Support
astralZsh Theme - Displays the
current notebook name in the context line of the prompt.
🔌 Plugins
nb includes support for plugins, which can be used to create new
subcommands, design themes, and otherwise extend the functionality of nb.
nb supports two types of plugins, identified by their file extensions:
Plugins are managed with the nb plugins subcommand and
are installed in the ${NB_DIR}/.plugins directory.
Plugins can be installed from either a URL or a path using the
nb plugins install subcommand.
# install a plugin from a URL
nb plugins install https://raw.githubusercontent.com/xwmx/nb/master/plugins/copy.nb-plugin

# install a plugin from a standard GitHub URL
nb plugins install https://github.com/xwmx/nb/blob/master/plugins/example.nb-plugin

# install a theme from a standard GitHub URL
nb plugins install https://github.com/xwmx/nb/blob/master/plugins/turquoise.nb-theme

# install a plugin from a path
nb plugins install plugins/example.nb-plugin
The <url> should be the full URL to the plugin file. nb also
recognizes regular GitHub URLs, which can be used interchangably with
raw GitHub URLs.
Installed plugins can be listed with nb plugins, which
optionally takes a name and prints full paths:
> nb plugins
copy.nb-plugin
example.nb-plugin
turquoise.nb-theme

> nb plugins copy.nb-plugin
copy.nb-plugin

> nb plugins --paths
/home/example/.nb/.plugins/copy.nb-plugin
/home/example/.nb/.plugins/example.nb-plugin
/home/example/.nb/.plugins/turquoise.nb-theme

> nb plugins turquoise.nb-theme --paths
/home/example/.nb/.plugins/turquoise.nb-theme
Use nb plugins uninstall to uninstall a plugin:
> nb plugins uninstall example.nb-plugin
Plugin successfully uninstalled:
/home/example/.nb/.plugins/example.nb-plugin
Creating Plugins
Plugins are written in a Bash-compatible shell scripting language and
have an .nb-plugin extension.
nb includes a few example plugins:
Create a new subcommand in three easy steps:
1. Add the new subcommand name with _subcommands add <name>:
_subcommands add "example"
2. Define help and usage text with _subcommands describe <subcommand> <usage>:
_subcommands describe "example" <<HEREDOC
Usage:
  nb example

Description:
  Print "Hello, World!"
HEREDOC
3. Define the subcommand as a function, named with a leading underscore:
_example() {
  printf "Hello, World!\\n"
}
That's it! 🎉
View the complete plugin:
plugins/example.nb-plugin
With example.nb-plugin installed, nb includes an nb example subcommand
that prints "Hello, World!"
For a full example,
copy.nb-plugin
adds copy / duplicate functionality to nb and demonstrates how to create a
plugin using nb subcommands and simple shell scripting.
You can install any plugin you create locally with
nb plugins install <path>, and you can publish it on GitHub, GitLab, or
anywhere else online and install it with nb plugins install <url>.
API
The nb API is the command line interface, which is designed for
composability and provides a variety of powerful options for interacting with
notes, bookmarks, notebooks, and nb functionality. Within plugins,
subcommands can be called using their function names, which are named with
leading underscores. Options can be used to output information in formats
suitable for parsing and processing:
# print the content of note 3 to standard output with no color
_show 3 --print --no-color

# list all unarchived global notebook names
_notebooks --names --no-color --unarchived --global

# list all filenames in the current notebook
_list --filenames --no-id --no-indicator

# print the path to the current notebook
_notebooks current --path
Selectors
nb notebooks can be selected by the user on a per-command
basis by prefixing the subcommand name or the note identifier (id, filename,
path, or title) with the notebook name followed by a colon. A colon-prefixed
argument is referred to as a "selector" and comes in two types: subcommand
selectors and identifier selectors.
Subcommand Selectors
notebook:
notebook:show
notebook:history
notebook:a
notebook:q
Idenitifer Selectors
1
example.md
title
/path/to/example.md
notebook:1
notebook:example.md
notebook:title
notebook:/path/to/example.md
nb automatically scans arguments for selectors with notebook names and
updates the current notebook if a valid one is found.
Identifier selectors are passed to subcommands as arguments along with
any subcommand options. Use show <selector> to query
information about the file specified in the selector. For example, to
obtain the filename of a selector-specified file, use
show <selector> --filename:
_example() {
  local _selector="${1:-}"
   && printf "Usage: example <selector>\\n" && exit 1

  # Get the filename using the selector.
  local _filename
  _filename="$(_show "${_selector}" --filename)"

  # Rest of subcommand function...
}
notebooks current --path returns the path to the current
notebook:
# _example() continued:

# get the notebook path
local _notebook_path
_notebook_path="$(_notebooks current --path)"

# print the file at "${_notebook_path}/${_filename}" to standard output
cat "${_notebook_path}/${_filename}"
See
copy.nb-plugin
for a practical example using both show <selector> --filename and
notebooks current --path along with other
subcommands called using their underscore-prefixed function names.
> nb Interactive Shell
nb has an interactive shell that can be started with
nb shell, nb -i, or nb --interactive:
$ nb shell
__          _
\ \   _ __, __
 \ \, '_ \, '_ \
 / /, _), /_/, _, _, _.__/
------------------
nb shell started. Enter ls to list notes and notebooks.
Enter help for usage information. Enter exit to exit.
nb> ls
home
----
[3] Example
[2] Sample
[1] Demo

nb> edit 3 --content "New content."
Updated: [3] Example

nb> bookmark https://example.com
Added: [4] 🔖 example.bookmark.md "Example Title (example.com)"

nb> ls
home
----
[4] 🔖 Example Title (example.com)
[3] Example
[2] Sample
[1] Demo

nb> bookmark url 4
https://example.com

nb> search "example"
[4] example.bookmark.md "Example (example.com)"
-----------------------------------------------
1:# Example (example.com)

3:<https://example.com>

[3] example.md "Example"
------------------------
1:# Example

nb> exit
$
The nb shell recognizes all nb subcommands and options,
providing a streamlined, distraction-free approach for working with nb.
Shortcut Aliases
Several core nb subcommands have single-character aliases to make
them faster to work with:
# `a` (add): add a new note named "example.md"
nb a example.md

# `b` (bookmark): list bookmarks
nb b

# `o` (open): open bookmark 12 in your web browser
nb o 12

# `p` (peek): open bookmark 6 in your terminal browser
nb p 6

# `e` (edit): edit note 5
nb e 5

# `d` (delete): delete note 19
nb d 19

# `s` (show): show note 27
nb s 27

# `q` (search): search notes for "example query"
nb q "example query"

# `h` (help): display the help information for the `add` subcommand
nb h add

# `u` (use): switch to example-notebook
nb u example-notebook
For more commands and options, run nb help or nb help <subcommand>
Help
nb help
__          _
\ \   _ __, __
 \ \, '_ \, '_ \
 / /, _), /_/, _, _, _.__/

[nb] Command line note-taking, bookmarking, archiving with plain-text data
storage, encryption, filtering and search, Git-backed versioning and syncing,
Pandoc-backed conversion, global and local notebooks, customizable color
themes, plugins, and more in a single portable, user-friendly script.

Help:
  nb help               Display this help information.
  nb help <subcommand>  View help information for <subcommand>.
  nb help --colors      View information about color settings.
  nb help --readme      View the `nb` README file.

Usage:
  nb
  nb [<ls options>...] [<id>, <filename>, <path>, <title>, <notebook>]
  nb [<url>] [<bookmark options>...]
  nb add [<filename>, <content>] [-c <content>, --content <content>]
         [-e, --encrypt] [-f <filename>, --filename <filename>]
         [-t <title>, --title <title>] [--type <type>]
  nb bookmark [<ls options>...]
  nb bookmark <url> [-c <comment>, --comment <comment>] [--edit]
              [-e, --encrypt] [-f <filename>, --filename <filename>]
              [-q, --quote] [-r <url>, --related <url>]... [--save-source]
              [--skip-content] [-t <tag1>,<tag2>..., --tags <tag1>,<tag2>...]
              [--title <title>]
  nb bookmark [list [<list-options>...]]
  nb bookmark (open, peek, url) (<id>, <filename>, <path>, <title>)
  nb bookmark (edit, delete) (<id>, <filename>, <path>, <title>)
  nb bookmark search <query>
  nb completions (check, install [-d, --download], uninstall)
  nb count
  nb delete (<id>, <filename>, <path>, <title>) [-f, --force]
  nb edit (<id>, <filename>, <path>, <title>)
          [-c <content>, --content <content>] [--edit]
          [-e <editor>, --editor <editor>]
  nb export (<id>, <filename>, <path>, <title>) <path> [-f, --force]
            [<pandoc options>...]
  nb export notebook <name> [<path>]
  nb export pandoc (<id>, <filename>, <path>, <title>)
            [<pandoc options>...]
  nb git [checkpoint [<message>], dirty]
  nb git <git-options>...
  nb help [<subcommand>] [-p, --print]
  nb help [-c, --colors], [-r, --readme], [-s, --short] [-p, --print]
  nb history [<id>, <filename>, <path>, <title>]
  nb import [copy, download, move] (<path>..., <url>) [--convert]
  nb import notebook <path> [<name>]
  nb init [<remote-url>]
  nb list [-e [<length>], --excerpt [<length>]] [--filenames]
          [-n <limit>, --limit <limit>, --<limit>] [--no-id]
          [--no-indicator] [-p, --pager] [--paths] [-s, --sort]
          [-r, --reverse] [-t <type>, --type <type>, --<type>]
          [<id>, <filename>, <path>, <title>, <query>]
  nb ls [-a, --all] [-e [<length>], --excerpt [<length>]] [--filenames]
        [-n <limit>, --limit <limit>, --<limit>] [--no-id] [--no-indicator]
        [-p, --pager] [--paths] [-s, --sort] [-r, --reverse]
        [-t <type>, --type <type>, --<type>]
        [<id>, <filename>, <path>, <title>, <query>]
  nb move (<id>, <filename>, <path>, <title>) [-f, --force] <notebook>
  nb notebooks [<name>] [--archived] [--global] [--local] [--names]
               [--paths] [--unarchived]
  nb notebooks add <name> [<remote-url>]
  nb notebooks (archive, open, peek, status, unarchive) [<name>]
  nb notebooks current [--path, --selected, --filename [<filename>]]
                       [--global, --local]
  nb notebooks delete <name> [-f, --force]
  nb notebooks (export <name> [<path>], import <path>)
  nb notebooks init [<path> [<remote-url>]]
  nb notebooks rename <old-name> <new-name>
  nb notebooks select <selector>
  nb notebooks show (<name>, <path>, <selector>) [--archived]
                    [--escaped, --name, --path, --filename [<filename>]]
  nb notebooks use <name>
  nb show (<id>, <filename>, <path>, <title>) [[-a, --added], --filename, --id, --info-line, --path, [-p, --print]
          [-r, --render], --selector-id, --title, --type [<type>], [-u, --updated]]
  nb notebooks use <name>
  nb open (<id>, <filename>, <path>, <title>, <notebook>)
  nb peek (<id>, <filename>, <path>, <title>, <notebook>)
  nb plugins [<name>] [--paths]
  nb plugins install [<path>, <url>] [--force]
  nb plugins uninstall <name> [--force]
  nb remote [remove, set <url> [-f, --force]]
  nb rename (<id>, <filename>, <path>, <title>) [-f, --force]
            (<name>, --reset, --to-bookmark, --to-note)
  nb run <command> [<arguments>...]
  nb search <query> [-a, --all] [-t <type>, --type <type>, --<type>]
                    [-l, --list] [--path]
  nb set [<name> [<value>], <number> [<value>]]
  nb settings [colors [<number>, themes], edit, list [--long]]
  nb settings (get, show, unset) (<name>, <number>)
  nb settings set (<name>, <number>) <value>
  nb shell [<subcommand> [<options>...], --clear-history]
  nb show (<id>, <filename>, <path>, <title>) [--added, --filename, --id, --info-line, --path, [-p, --print] [-r, --render], --selector-id, --title, --type [<type>], --updated]
  nb show <notebook>
  nb subcommands [add <name>...] [alias <name> <alias>]
                 [describe <name> <usage>]
  nb sync [-a, --all]
  nb update
  nb use <notebook>
  nb -i, --interactive [<subcommand> [<options>...]]
  nb -h, --help, help [<subcommand>, --readme]
  nb --no-color
  nb --version, version

Subcommands:
  (default)    List notes and notebooks. This is an alias for `nb ls`.
               When a <url> is provided, create a new bookmark.
  add          Add a new note.
  bookmark     Add, open, list, and search bookmarks.
  completions  Install and uninstall completion scripts.
  count        Print the number of notes.
  delete       Delete a note.
  edit         Edit a note.
  export       Export a note to a variety of different formats.
  git          Run `git` commands within the current notebook.
  help         View help information for the program or a subcommand.
  history      View git history for the current notebook or a note.
  import       Import a file into the current notebook.
  init         Initialize the first notebook.
  list         List notes in the current notebook.
  ls           List notebooks and notes in the current notebook.
  move         Move a note to a different notebook.
  notebooks    Manage notebooks.
  open         Open a bookmarked web page or notebook folder, or edit a note.
  peek         View a note, bookmarked web page, or notebook in the terminal.
  plugins      Install and uninstall plugins and themes.
  remote       Get, set, and remove the remote URL for the notebook.
  rename       Rename a note.
  run          Run shell commands within the current notebook.
  search       Search notes.
  settings     Edit configuration settings.
  shell        Start the `nb` interactive shell.
  show         Show a note or notebook.
  status       Run `git status` in the current notebook.
  subcommands  List, add, alias, and describe subcommands.
  sync         Sync local notebook with the remote repository.
  update       Update `nb` to the latest version.
  use          Switch to a notebook.
  version      Display version information.

Notebook Usage:
  nb <notebook>:[<subcommand>] [<identifier>] [<options>...]
  nb <subcommand> <notebook>:<identifier> [<options>...]

Program Options:
  -i, --interactive   Start the `nb` interactive shell.
  -h, --help          Display this help information.
  --no-color          Print without color highlighting.
  --version           Display version information.

More Information:
  https://github.com/xwmx/nb
bookmark help
    __                __                        __
   / /_  ____  ____  / /______ ___  ____ ______/ /__
  / __ \/ __ \/ __ \/ //_/ __ `__ \/ __ `/ ___/ //_/
 / /_/ / /_/ / /_/ / ,< / / / / / / /_/ / /  / ,<
/_.___/\____/\____/_/, _/_/ /_/ /_/\__,_/_/  /_/, _, bookmark -- Command line bookmarking with tagging, encryption,
full-text page content search with regular expression support,
GUI and terminal browser support, and data stored in plain text
Markdown files with Git-backed versioning and syncing.

Usage:
  bookmark [<ls options>...]
  bookmark <url> [-c <comment>, --comment <comment>] [--edit]
              [-e, --encrypt] [-f <filename>, --filename <filename>]
              [-q, --quote] [-r <url>, --related <url>]... [--save-source]
              [--skip-content] [-t <tag1>,<tag2>..., --tags <tag1>,<tag2>...]
              [--title <title>]
  bookmark list [<list-options>...]
  bookmark (open, peek, url) (<id>, <filename>, <path>, <title>)
  bookmark (edit, delete) (<id>, <filename>, <path>, <title>)
  bookmark search <query>

Options:
  -c, --comment <comment>      A comment or description for this bookmark.
  --edit                       Open the bookmark in your editor before saving.
  -e, --encrypt                Encrypt the bookmark with a password.
  -f, --filename <filename>    The filename for the bookmark. It is
                               recommended to omit the extension so the
                               default bookmark extension is used.
  -q, --quote <quote>          A quote or excerpt from the saved page.
                               Alias: `--excerpt`
  -r, --related <url>          A URL for a page related to the bookmarked page.
                               Multiple `--related` flags can be used in a
                               command to save multiple related URLs.
  --save-source                Save the page source as HTML.
  --skip-content               Omit page content from the note.
  -t, --tags <tag1>,<tag2>...  A comma-separated list of tags.
  --title <title>              The bookmark title. When not specified,
                               `nb` will use the html <title> tag.

Subcommands:
  (default)  Add a new bookmark for <url>, or list bookmarks.
             Bookmarks can also be added with `nb <url>`
  delete     Delete a bookmark.
  edit       Edit a bookmark.
  list       List bookmarks in the current notebook.
             Shortcut Alias: `ls`
  open       Open the bookmarked page in your system's primary web browser.
             Shortcut Alias: `o`
  peek       Open the bookmarked page in your terminal web browser.
             Alias: `preview`
             Shortcut Alias: `p`
  search     Search bookmarks for <query>.
             Shortcut Alias: `q`
  url        Print the URL for the specified bookmark.

Description:
  Create, view, search, edit, and delete bookmarks.

  By default, the html page content is saved within the bookmark, making the
  bookmarked page available for full-text search. When Pandoc [1] is
  installed, the HTML content will be converted to Markdown before saving.
  When readability-cli [2] is install, markup is cleaned up to focus on
  content.

  `peek` opens the page in `w3m` [3] or `lynx` [4] when available.
  To specify a preferred browser, set the `$BROWSER` environment variable
  in your .bashrc, .zshrc, or equivalent, e.g., `export BROWSER="lynx"`.

  Bookmarks are identified by the `.bookmark.md` file extension. The
  bookmark URL is the first URL in the file within "<" and ">" characters:

    <https://www.example.com>

    1. https://pandoc.org/
    2. https://gitlab.com/gardenappl/readability-cli
    3. https://en.wikipedia.org/wiki/W3m
    4. https://en.wikipedia.org/wiki/Lynx_(web_browser)

Examples:
  bookmark https://example.com
  bookmark https://example.com --encrypt
  bookmark https://example.com --tags example,sample,demo
  bookmark https://example.com/about -c "Example comment."
  bookmark https://example.com/faqs -f example-filename
  bookmark https://example.com --quote "Example quote or excerpt."
  bookmark list
  bookmark search "example query"
  bookmark open 5

------------------------------------------
Part of `nb` (https://github.com/xwmx/nb).
For more information, see: `nb help`.
Subcommands
add
Usage:
  nb add [<filename>, <content>] [-c <content>, --content <content>]
         [--edit] [-e, --encrypt] [-f <filename>, --filename <filename>]
         [-t <title>, --title <title>] [--type <type>]

Options:
  -c, --content <content>     The content for the new note.
  --edit                      Open the note in the editor before saving when
                              content is piped or passed as an argument.
  -e, --encrypt               Encrypt the note with a password.
  -f, --filename <filename>   The filename for the new note. The default
                              extension is used when the extension is omitted.
  -t, --title <title>         The title for a new note. If `--title` is
                              present, the filename will be derived from the
                              title, unless `--filename` is specified.
  --type <type>               The file type for the new note, as a file
                              extension.

Description:
  Create a new note.

  If no arguments are passed, a new blank note file is opened with
  `$EDITOR`, currently set to "example". If a non-option argument is
  passed, `nb` will treat it as a <filename≥ if a file extension is found.
  If no file extension is found, `nb` will treat the string as
  <content> and will create a new note without opening the editor.
  `nb add` can also create a new note with piped content.

  `nb` creates Markdown files by default. To create a note with a
  different file type, use the extension in the filename or use the `--type`
  option. To change the default file type, use `nb set default_extension`.

  When the `-e` / `--encrypt` option is used, `nb` will encrypt the
  note with AES-256 using OpenSSL by default, or GPG, if configured in
  `nb set encryption_tool`.

Examples:
  nb add
  nb add example.md
  nb add "Note content."
  nb add example.md --title "Example Title" --content "Example content."
  echo "Note content.", nb add
  nb add -t "Secret Document" --encrypt
  nb example:add
  nb example:add -t "Title"
  nb a
  nb a "Note content."
  nb example:a
  nb example:a -t "Title"

Aliases: `create`, `new`
Shortcut Alias: `a`
bookmark
Usage:
  nb bookmark [<ls options>...]
  nb bookmark <url> [-c <comment>, --comment <comment>] [--edit]
              [-e, --encrypt] [-f <filename>, --filename <filename>]
              [-q, --quote] [-r <url>, --related <url>]... [--save-source]
              [--skip-content] [-t <tag1>,<tag2>..., --tags <tag1>,<tag2>...]
              [--title <title>]
  nb bookmark list [<list-options>...]
  nb bookmark (open, peek, url) (<id>, <filename>, <path>, <title>)
  nb bookmark (edit, delete) (<id>, <filename>, <path>, <title>)
  nb bookmark search <query>

Options:
  -c, --comment <comment>      A comment or description for this bookmark.
  --edit                       Open the bookmark in your editor before saving.
  -e, --encrypt                Encrypt the bookmark with a password.
  -f, --filename <filename>    The filename for the bookmark. It is
                               recommended to omit the extension so the
                               default bookmark extension is used.
  -q, --quote <quote>          A quote or excerpt from the saved page.
                               Alias: `--excerpt`
  -r, --related <url>          A URL for a page related to the bookmarked page.
                               Multiple `--related` flags can be used in a
                               command to save multiple related URLs.
  --save-source                Save the page source as HTML.
  --skip-content               Omit page content from the note.
  -t, --tags <tag1>,<tag2>...  A comma-separated list of tags.
  --title <title>              The bookmark title. When not specified,
                               `nb` will use the html <title> tag.


Subcommands:
  (default)  Add a new bookmark for <url>, or list bookmarks.
             Bookmarks can also be added with `nb <url>`
  delete     Delete a bookmark.
  edit       Edit a bookmark.
  list       List bookmarks in the current notebook.
             Shortcut Alias: `ls`
  open       Open the bookmarked page in your system's primary web browser.
             Shortcut Alias: `o`
  peek       Open the bookmarked page in your terminal web browser.
             Alias: `preview`
             Shortcut Alias: `p`
  search     Search bookmarks for <query>.
             Shortcut Alias: `q`
  url        Print the URL for the specified bookmark.

Description:
  Create, view, search, edit, and delete bookmarks.

  By default, the html page content is saved within the bookmark, making the
  bookmarked page available for full-text search. When Pandoc [1] is
  installed, the HTML content will be converted to Markdown before saving.
  When readability-cli [2] is install, markup is cleaned up to focus on
  content.

  `peek` opens the page in `w3m` [3] or `lynx` [4] when available.
  To specify a preferred browser, set the `$BROWSER` environment variable
  in your .bashrc, .zshrc, or equivalent, e.g., `export BROWSER="lynx"`.

  Bookmarks are identified by the `.bookmark.md` file extension. The
  bookmark URL is the first URL in the file within "<" and ">" characters:

    <https://www.example.com>

    1. https://pandoc.org/
    2. https://gitlab.com/gardenappl/readability-cli
    3. https://en.wikipedia.org/wiki/W3m
    4. https://en.wikipedia.org/wiki/Lynx_(web_browser)

Examples:
  nb https://example.com
  nb example: https://example.com
  nb https://example.com --encrypt
  nb https://example.com --tags example,sample,demo
  nb https://example.com/about -c "Example comment."
  nb https://example.com/faqs -f example-filename
  nb https://example.com --quote "Example quote or excerpt."
  nb bookmark list
  nb bookmark search "example query"
  nb bookmark open 5
  nb b

Shortcut Alias: `b`
completions
Usage:
  nb completions (check, install [-d, --download], uninstall)

Options:
  -d, --download  Download the completion scripts and install.

Description:
  Manage completion scripts. For more information, visit:
  https://github.com/xwmx/nb/blob/master/etc/README.md
count
Usage:
  nb count

Description:
  Print the number of items in the current notebook.
delete
Usage:
  nb delete (<id>, <filename>, <path>, <title>) [-f, --force]

Options:
  -f, --force   Skip the confirmation prompt.

Description:
  Delete a note.

Examples:
  nb delete 3
  nb delete example.md
  nb delete "A Document Title"
  nb 3 delete --force
  nb example:delete 12
  nb delete example:12
  nb example:12 delete
  nb d 3
  nb 3 d
  nb d example:12
  nb example:12 d

Shortcut Alias: `d`
edit
Usage:
  nb edit (<id>, <filename>, <path>, <title>)
          [-c <content>, --content <content>] [--edit]
          [-e <editor>, --editor <editor>]

Options:
  -c, --content <content>  The content for the new note.
  --edit                   Open the note in the editor before saving when
                           content is piped or passed as an argument.
  -e, --editor <editor>    Edit the note with <editor>, overriding the editor
                           specified in the `$EDITOR` environment variable.

Description:
  Open the specified note in `$EDITOR` or <editor> if specified. Content
  piped to `nb edit` or passed using the `--content` option will will be
  appended to the file without opening it in the editor, unless the
  `--edit` flag is specified.

  Non-text files will be opened in your system's preferred app or program for
  that file type.

Examples:
  nb edit 3
  nb edit example.md
  nb edit "A Document Title"
  echo "Content to append.", nb edit 1
  nb 3 edit
  nb example:edit 12
  nb edit example:12
  nb example:12 edit
  nb e 3
  nb 3 e
  nb e example:12
  nb example:12 e

Shortcut Alias: `e`
env
Usage:
  nb env [install]

Subcommands:
  install  Install dependencies on supported systems.

Description:
  Print program environment and configuration information, or install
  dependencies.
export
Usage:
  nb export (<id>, <filename>, <path>, <title>) <path> [-f, --force]
            [<pandoc options>...]
  nb export notebook <name> [<path>]
  nb export pandoc (<id>, <filename>, <path>, <title>)
            [<pandoc options>...]

Options:
  -f, --force   Skip the confirmation prompt when overwriting an existing file.

Subcommands:
  (default)     Export a file to <path>. If <path> has a different extension
                than the source note, convert the note using `pandoc`.
  notebook      Export the notebook <name> to the current directory or <path>.
                Alias for `nb notebooks export`.
  pandoc        Export the file to standard output or a file using `pandoc`.
                `export pandoc` prints to standard output by default.

Description:
  Export a file or notebook.

  If Pandoc [1] is available, convert the note from its current format
  to the format of the output file as indicated by the file extension
  in <path>. Any additional arguments are passed directly to Pandoc.
  See the Pandoc help information for available options.

    1. https://pandoc.org/

Examples:
  # Export an Emacs Org mode note
  nb export example.org /path/to/example.org

  # Export a Markdown note to HTML and print to standard output
  nb export pandoc example.md --from=markdown_strict --to=html

  # Export a Markdown note to a .docx Microsoft Office Word document
  nb export example.md /path/to/example.docx

  # Export note 12 in the "sample" notebook to HTML
  nb export sample:12 /path/to/example.html
git
Usage:
  nb git [checkpoint [<message>], dirty]
  nb git <git-options>...

Subcommands:
  checkpoint    Create a new git commit in the current notebook and sync with
                the remote if `nb set auto_sync` is enabled.
  dirty         0 (success, true) if there are uncommitted changes in
                <notebook-path>. 1 (error, false) if <notebook-path> is clean.

Description:
  Run `git` commands within the current notebook directory.

Examples:
  nb git status
  nb git diff
  nb git log
  nb example:git status
help
Usage:
  nb help [<subcommand>] [-p, --print]
  nb help [-c, --colors], [-r, --readme], [-s, --short] [-p, --print]

Options:
  -c, --colors  View information about color themes and color settings.
  -p, --print   Print to standard output / terminal.
  -r, --readme  View the `nb` README file.
  -s, --short   Print shorter help without subcommand descriptions.

Description:
  Print the program help information. When a subcommand name is passed, print
  the help information for the subcommand.

Examples:
  nb help
  nb help add
  nb help import
  nb h notebooks
  nb h e

Shortcut Alias: `h`
history
Usage:
  nb history [<id>, <filename>, <path>, <title>]

Description:
  Display notebook history using `tig` [1] (if available) or `git log`.
  When a note is specified, the history for that note is displayed.

    1. https://github.com/jonas/tig

Examples:
  nb history
  nb history example.md
  nb 3 history
  nb history example:
  nb example:history
  nb example:history 12
  nb history example:12
  nb example:12 history
import
Usage:
  nb import (<path>..., <url>)
  nb import copy <path>...
  nb import download <url> [--convert]
  nb import move <path>...
  nb import notebook <path> [<name>]

Options:
  --convert  Convert HTML content to Markdown.

Subcommands:
  (default) Copy or download the file(s) at <path> or <url>.
  copy      Copy the file(s) at <path> into the current notebook.
  download  Download the file at <url> into the current notebook.
  move      Move the file(s) at <path> into the current notebook.
  notebook  Import the local notebook at <path> to make it global.

Description:
  Copy, move, or download files into the current notebook or import
  a local notebook to make it global.

Examples:
  nb import ~/Pictures/example.png
  nb import ~/Documents/example.docx
  nb import https://example.com/example.pdf
  nb example:import https://example.com/example.jpg
  nb import ./*
  nb import ./*.md
init
Usage:
  nb init [<remote-url>]

Description:
  Initialize the local data directory and generate configuration file for `nb`
  if it doesn't exist yet at:

      ~/.nbrc

Examples:
  nb init
  nb init https://github.com/example/example.git
list
Usage:
  nb list [-e [<length>], --excerpt [<length>]] [--filenames]
          [-n <limit>, --limit <limit>, --<limit>] [--no-id]
          [--no-indicator] [-p, --pager] [--paths] [-s, --sort]
          [-r, --reverse] [-t <type>, --type <type>, --<type>]
          [<id>, <filename>, <path>, <title>, <query>]

Options:
  -e, --excerpt [<length>]        Print an excerpt <length> lines long under
                                  each note's filename [default: 3].
  --filenames                     Print the filename for each note.
  -n, --limit <limit>, --<limit>  The maximum number of notes to list.
  --no-id                         Don't include the id in list items.
  --no-indicator                  Don't include the indicator in list items.
  -p, --pager                     Display output in the pager.
  --paths                         Print the full path to each item.
  -s, --sort                      Order notes by id.
  -r, --reverse                   List items in reverse order.
  -t, --type <type>, --<type>     List items of <type>. <type> can be a file
                                  extension or one of the following types:
                                  archive, audio, book, bookmark, document,
                                  folder, image, note, text, video

Description:
  List notes in the current notebook.

  When <id>, <filename>, <path>, or <title> are present, the listing for the
  matching note will be displayed. When no match is found, titles and
  filenames will be searched for any that match <query> as a case-insensitive
  regular expression.

Indicators:
  🔉  Audio
  📖  Book
  🔖  Bookmark
  🔒  Encrypted
  📂  Folder
  🌄  Image
  📄  PDF, Word, or Open Office document
  📹  Video

Examples:
  nb list
  nb list example.md -e 10
  nb list --excerpt --no-id
  nb list --filenames --reverse
  nb list "^Example.*"
  nb list --10
  nb list --type document
  nb example:list
ls
Usage:
  nb ls [-a, --all] [-e [<length>], --excerpt [<length>]] [--filenames]
        [--no-id] [--no-indicator] [-n <limit>, --limit <limit>, --<limit>]
        [-p, --pager] [--paths] [-s, --sort] [-r, --reverse]
        [-t <type>, --type <type>, --<type>]
        [<id>, <filename>, <path>, <title>, <query>]

Options:
  -a, --all                       Print all items in the notebook. Equivalent
                                  to no limit.
  -e, --excerpt [<length>]        Print an excerpt <length> lines long under
                                  each note's filename [default: 3].
  --filenames                     Print the filename for each note.
  -n, --limit <limit>, --<limit>  The maximum number of listed items.
                                  [default: 20]
  --no-id                         Don't include the id in list items.
  --no-indicator                  Don't include the indicator in list items.
  -p, --pager                     Display output in the pager.
  --paths                         Print the full path to each item.
  -s, --sort                      Order notes by id.
  -r, --reverse                   List items in reverse order.
  -t, --type <type>, --<type>     List items of <type>. <type> can be a file
                                  extension or one of the following types:
                                  archive, audio, book, bookmark, document,
                                  folder, image, note, text, video

Description:
  List notebooks and notes in the current notebook, displaying note titles
  when available. `nb ls` is a combination of `nb notebooks` and
  `nb list` in one view.

  When <id>, <filename>, <path>, or <title> are present, the listing for the
  matching note will be displayed. When no match is found, titles and
  filenames will be searched for any that match <query> as a case-insensitive
  regular expression.

  Options are passed through to `list`. For more information, see
  `nb help list`.

Indicators:
  🔉  Audio
  📖  Book
  🔖  Bookmark
  🔒  Encrypted
  📂  Folder
  🌄  Image
  📄  PDF, Word, or Open Office document
  📹  Video

Examples:
  nb
  nb --all
  nb ls
  nb ls example.md -e 10
  nb ls --excerpt --no-id
  nb ls --reverse
  nb ls "^Example.*"
  nb ls --10
  nb ls --type document
  nb example:
  nb example: -ae
  nb example:ls
move
Usage:
  nb move (<id>, <filename>, <path>, <title>) [-f, --force] <notebook>

Options:
  -f, --force   Skip the confirmation prompt.

Description:
  Move the specified note to <notebook>.

Examples:
  nb move 1 example-notebook
  nb move example.md example-notebook
  nb example:move sample.md other-notebook
  nb move example:sample.md other-notebook
  nb mv 1 example-notebook

Shortcut Alias: `mv`
notebooks
Usage:
  nb notebooks [<name>] [--archived] [--global] [--local] [--names]
               [--paths] [--unarchived]
  nb notebooks add <name> [<remote-url>]
  nb notebooks (archive, open, peek, status, unarchive) [<name>]
  nb notebooks current [--path, --selected, --filename [<filename>]]
                       [--global, --local]
  nb notebooks delete <name> [-f, --force]
  nb notebooks (export <name> [<path>], import <path>)
  nb notebooks init [<path> [<remote-url>]]
  nb notebooks rename <old-name> <new-name>
  nb notebooks select <selector>
  nb notebooks show (<name>, <path>, <selector>) [--archived]
                    [--escaped, --name, --path, --filename [<filename>]]
  nb notebooks use <name>

Options:
  --archived               List archived notebooks, or return archival status
                           with `show`.
  --escaped                Print the notebook name with spaces escaped.
  --filename [<filename>]  Print an available filename for the notebooks. When
                           <filename> is provided, check for an existing file
                           and provide a filename with an appended sequence
                           number for uniqueness.
  --global                 List global notebooks or the notebook set globally
                           with `use`.
  --local                  Exit with 0 if current within a local notebook,
                           otherwise exit with 1.
  -f, --force              Skip the confirmation prompt.
  --name, --names          Print the notebook name.
  --path, --paths          Print the notebook path.
  --selected               Exit with 0 if the current notebook differs from
                           the current global notebook, otherwise exit with 1.
  --unarchived             Only list unarchived notebooks.

Subcommands:
  (default)  List notebooks.
  add        Create a new global notebook. When an existing notebook's
             <remote-url> is specified, create the new global notebook as a
             clone of <remote-url>.
             Aliases: `notebooks create`, `notebooks new`
  archive    Set the current notebook or notebook <name> to "archived" status.
  export     Export the notebook <name> to the current directory or <path>,
             making it usable as a local notebook.
  import     Import the local notebook at <path> to make it global.
  init       Create a new local notebook. Specify a <path> or omit to
             initialize the current working directory as a local notebook.
             Specify <remote-url> to clone an existing notebook.
  current    Print the current notebook name or path.
  delete     Delete a notebook.
  open       Open the current notebook directory or notebook <name> in your
             file browser, explorer, or finder.
             Shortcut Alias: `o`
  peek       Open the current notebook directory or notebook <name> in the
             first tool found in the following list:
             `ranger` [1], `mc` [2], `exa` [3], or `ls`.
             Shortcut Alias: `p`
  rename     Rename a notebook.
  select     Set the current notebook from a colon-prefixed selector.
             Not persisted. Selection format: <notebook>:<identifier>
  show       Show and return information about a specified notebook.
  status     Print the archival status of the current notebook or
             notebook <name>.
  unarchive  Remove "archived" status from current notebook or notebook <name>.
  use        Switch to a notebook.

    1. https://ranger.github.io/
    2. https://en.wikipedia.org/wiki/Midnight_Commander
    3. https://github.com/ogham/exa

Description:
  Manage notebooks.

Examples:
  nb notebooks --names
  nb notebooks add sample
  nb notebooks add example https://github.com/example/example.git
  nb n current --path
  nb n archive example

Shortcut Alias: `n`
open
Usage:
  nb open (<id>, <filename>, <path>, <title>, <notebook>)

Description:
  Open a note or notebook. When the note is a bookmark, open the bookmarked
  page in your system's primary web browser. When the note is in a text format
  or any other file type, `open` is the equivalent of `edit`. `open`
  with a notebook opens the notebook folder in the system's file browser.

Examples:
  nb open 3
  nb open example.bookmark.md
  nb 3 open
  nb example:open 12
  nb open example:12
  nb example:12 open
  nb o 3
  nb 3 o
  nb o example:12
  nb example:12 o

See also:
  nb help bookmark
  nb help edit

Shortcut Alias: `o`
peek
Usage:
  nb peek (<id>, <filename>, <path>, <title>, <notebook>)

Description:
  View a note or notebook in the terminal. When the note is a bookmark, view
  the bookmarked page in your terminal web browser. When the note is in a text
  format or any other file type, `peek` is the equivalent of `show`. When
  used with a notebook, `peek` opens the notebook folder first tool found in
  the following list: `ranger` [1], `mc` [2], `exa` [3], or `ls`.

    1. https://ranger.github.io/
    2. https://en.wikipedia.org/wiki/Midnight_Commander
    3. https://github.com/ogham/exa

Examples:
  nb peek 3
  nb peek example.bookmark.md
  nb 3 peek
  nb example:peek 12
  nb peek example:12
  nb example:12 peek
  nb p 3
  nb 3 p
  nb p example:12
  nb example:12 p

See also:
  nb help bookmark
  nb help show

Alias: `preview`
Shortcut Alias: `p`
plugins
Usage:
  nb plugins [<name>] [--paths] [--force]
  nb plugins install [<path>, <url>] [--force]
  nb plugins uninstall <name>

Options:
  --paths  Print the full path to each plugin.

Subcommands:
  (default)  List plugins.
  install    Install a plugin from a <path> or <url>.
  uninstall  Uninstall the specified plugin.

Description:
  Manage plugins and themes.

Plugin Extensions:
  .nb-theme   Plugins defining color themes.
  .nb-plugin  Plugins defining new subcommands and functionality.
remote
Usage:
  nb remote
  nb remote remove
  nb remote set <url> [-f, --force]

Subcommands:
  (default)     Print the remote URL for the notebook.
  remove        Remove the remote URL from the notebook.
  set           Set the remote URL for the notebook.

Options:
  -f, --force   Skip the confirmation prompt.

Description:
  Get, set, and remove the remote repository URL for the current notebook.

Examples:
  nb remote set https://github.com/example/example.git
  nb remote remove
rename
Usage:
  nb rename (<id>, <filename>, <path>, <title>) [-f, --force]
            (<name>, --reset, --to-bookmark, --to-note)

Options:
  -f, --force     Skip the confirmation prompt.
  --reset         Reset the filename to the last modified timestamp.
  --to-bookmark   Preserve the existing filename and replace the extension
                  with ".bookmark.md" to convert the note to a bookmark.
  --to-note       Preserve the existing filename and replace the bookmark's
                  ".bookmark.md" extension with ".md" to convert the bookmark
                  to a Markdown note.

Description:
  Rename a note. Set the filename to <name> for the specified note file. When
  file extension is omitted, the existing extension will be used.

Examples:
  # Rename "example.md" to "example.org"
  nb rename example.md example.org

  # Rename note 3 ("example.md") to "New Name.md"
  nb rename 3 "New Name"

  # Rename "example.bookmark.md" to "New Name.bookmark.md"
  nb rename example.bookmark.md "New Name"

  # Rename note 3 ("example.md") to bookmark named "example.bookmark.md"
  nb rename 3 --to-bookmark

  # Rename note 12 in the "example" notebook to "sample.md"
  nb example:rename 3 "sample.md"
run
Usage:
  nb run <command> [<arguments>...]

Description:
  Run shell commands within the current notebook directory.

Examples:
  nb run ls -la
  nb run find . -name 'example*'
  nb run rg example
search
Usage:
  nb search <query> [-a, --all] [-t <type>, --type <type>, --<type>]
                    [-l, --list] [--path]

Options:
  -a, --all                     Search all unarchived notebooks.
  -l, --list                    Print the id, filename, and title listing for
                                each matching file, without the excerpt.
  --path                        Print the full path for each matching file.
  -t, --type <type>, --<type>   Search items of <type>. <type> can be a file
                                extension or one of the following types:
                                note, bookmark, document, archive, image,
                                video, audio, folder, text
Description:
  Search notes. Uses the first available tool in the following list:
    1. `rg`    https://github.com/BurntSushi/ripgrep
    2. `ag`    https://github.com/ggreer/the_silver_searcher
    3. `ack`   https://beyondgrep.com/
    4. `grep`  https://en.wikipedia.org/wiki/Grep

Examples:
  # search current notebook for "example query"
  nb search "example query"

  # search the notebook "example" for "example query"
  nb example:search "example query"

  # search all notebooks for "example query" and list matching items
  nb search "example query" --all --list

  # search notes for "Example" OR "Sample"
  nb search "Example, Sample"

  # search with a regular expression
  nb search "\d\d\d-\d\d\d\d"

  # search the current notebook for "example query"
  nb q "example query"

  # search the notebook named "example" for "example query"
  nb example:q "example query"

  # search all notebooks for "example query" and list matching items
  nb q -la "example query"

Shortcut Alias: `q`
settings
Usage:
  nb set [<name> [<value>], <number> [<value>]]
  nb settings colors [<number>, themes]
  nb settings edit
  nb settings get   (<name>, <number>)
  nb settings list  [--long]
  nb settings set   (<name>, <number>) <value>
  nb settings show  (<name>, <number>)
  nb settings unset (<name>, <number>)

Subcommands:
  (default)  Open the settings prompt, to <name> or <number>, if present.
             When <value> is also present, assign <value> to the setting.
  colors     Print a table of available colors and their xterm color numbers.
             When <number> is provided, print the number in its color.
             `settings colors themes` prints a list of installed themes.
  edit       Open the `nb` configuration file in `$EDITOR`.
  get        Print the value of a setting.
  list       List information about available settings.
  set        Assign <value> to a setting.
  show       Print the help information and current value of a setting.
  unset      Unset a setting, returning it to the default value.

Description:
  Configure `nb`. Use `nb settings set` to customize a setting and
  `nb settings unset` to restore the default for a setting.

  Use the `nb set` alias to quickly assign values to settings:

    nb set color_theme blacklight
    nb set limit 40

Examples:
  nb settings
  nb set 5 "org"
  nb set color_primary 105
  nb set unset color_primary
  nb set color_secondary unset
  nb settings colors
  nb settings colors 105
  nb set limit 15

Alias: `set`
auto_sync
[1]  auto_sync
     ---------
     By default, operations that trigger a git commit like `add`, `edit`,
     and `delete` will sync notebook changes to the remote repository, if
     one is set. To disable this behavior, set this to "0".

     • Default Value: 1
color_primary
[2]  color_primary
     -------------
     The primary color used to highlight identifiers and messages. Often this
     can be set to an xterm color number between 0 and 255. Some terminals
     support many more colors.

     • Default Value: 68 (blue) for 256 color terminals,
                      4  (blue) for  8  color terminals.
color_secondary
[3]  color_secondary
     ---------------
     The color used for lines and footer elements. Often this can be set to an
     xterm color number between 0 and 255. Some terminals support many more
     colors.

     • Default Value: 8
color_theme
[4]  color_theme
     -----------
     The color theme.

     To view screenshots of the built-in themes, visit:

         https://git.io/nb-docs-color-themes

     `nb` supports custom, user-defined themes. To learn more, run:

         nb help --colors

     To change the syntax highlighting theme, use:

         nb set syntax_theme

     • Available themes:

         blacklight
         console
         desert
         electro
         forest
         monochrome
         nb
         ocean
         raspberry
         unicorn
         utility

     • Default Value: nb
default_extension
[5]  default_extension
     -----------------
     The default extension to use for note files. Change to "org" for Emacs
     Org mode files, "rst" for reStructuredText, "txt" for plain text, or
     whatever you prefer.

     • Default Value: md
editor
[6]  editor
     ------
     The command line text editor to use with `nb`.

     • Example Values:

         atom
         code
         emacs
         macdown
         mate
         micro
         nano
         pico
         subl
         vi
         vim
encryption_tool
[7]  encryption_tool
     ---------------
     The tool used for encrypting notes.

     • Supported Values: openssl, gpg
     • Default Value:    openssl
footer
[8]  footer
     ------
     By default, `nb` and `nb ls` include a footer with example commands.
     To hide this footer, set this to "0".

     • Default Value: 1
header
[9]  header
     ------
     By default, `nb` and `nb ls` include a header listing available notebooks.
     Set the alignment, or hide the header with "0".

     • Supported Values:

         0  Hide Header
         1  Dynamic Alignment
              - Left justified when list is shorter than terminal width.
              - Center aligned when list is longer than terminal width.
         2  Center Aligned (default)
         3  Left Justified

     • Default Value: 1
limit
[10] limit
     -----
     The maximum number of notes included in the `nb` and `nb ls` lists.

     • Default Value: 20
nb_dir
[11] nb_dir
     ------
     The location of the directory that contains the notebooks.

     For example, to sync all notebooks with Dropbox, create a folder at
     `~/Dropbox/Notes` and run: `nb settings set nb_dir ~/Dropbox/Notes`

     • Default Value: ~/.nb
syntax_theme
[12] syntax_theme
     ------------
     The syntax highlighting theme. View examples with:

         bat --list-themes

     • Available themes:

         1337
         DarkNeon
         Dracula
         GitHub
         Monokai Extended
         Monokai Extended Bright
         Monokai Extended Light
         Monokai Extended Origin
         Nord
         OneHalfDark
         OneHalfLight
         Solarized (dark)
         Solarized (light)
         Sublime Snazzy
         TwoDark
         ansi-dark
         ansi-light
         base16
         base16-256
         gruvbox
         gruvbox-light
         gruvbox-white
         zenburn

     • Default Value: base16
shell
Usage:
  nb shell [<subcommand> [<options>...], --clear-history]

Optons:
  --clear-history  Clear the `nb` shell history.

Description:
  Start the `nb` interactive shell. Type "exit" to exit.

  `nb shell` recognizes all `nb` subcommands and options, providing
  a streamlined, distraction-free approach for working with `nb`.

  When <subcommand> is present, the command will run as the shell is opened.

Example:
  $ nb shell
  nb> ls 3
  [3] Example

  nb> edit 3 --content "New content."
  Updated: [3] Example

  nb> notebook
  home

  nb> exit
  $
show
Usage:
  nb show (<id>, <filename>, <path>, <title>) [[-a, --added], --filename, --id, --info-line, --path, [-p, --print]
          [-r, --render], --selector-id, --title, --type [<type>], [-u, --updated]]
  nb show <notebook>

Options:
  -a, --added      Print the date and time when the item was added.
  --filename       Print the filename of the item.
  --id             Print the id number of the item.
  --info-line      Print the id, filename, and title of the item.
  --path           Print the full path of the item.
  -p, --print      Print to standard output / terminal.
  -r, --render     Use `pandoc` [1] to render the file to HTML and display
                   in the terminal web browser. If either `pandoc` or a
                   browser are unavailable, `-r` / `--render` is ignored.
  --selector-id    Given a selector (e.g., notebook:example.md), print the
                   identifier portion (example.md).
  --title          Print the title of the note.
  --type [<type>]  Print the file extension or, when <type> is specified,
                   return true if the item matches <type>. <type> can be a
                   file extension or one of the following types:
                   archive, audio, bookmark, document, folder, image,
                   text, video
  -u, --updated    Print the date and time of the last recorded change.

Description:
  Show an item or notebook. Notes in text file formats can be rendered or
  printed to standard output. Non-text files will be opened in your system's
  preferred app or program for that file type.

  By default, the item will be opened using `less` or the program configured
  in the `$PAGER` environment variable. Use the following keys to navigate
  in `less` (see `man less` for more information):

    Key               Function
    ---               --------
    mouse scroll      Scroll up or down
    arrow up or down  Scroll one line up or down
    f                 Jump forward one window
    b                 Jump back one window
    d                 Jump down one half window
    u                 Jump up one half window
    /<query>          Search for <query>
    n                 Jump to next <query> match
    q                 Quit

  To skip the pager and print to standard output, use the `-p` / `--print`
  option.

  `-r` / `--render` automatically uses either `w3m` [2] or `lynx` [3].
  To specify a preferred browser, set the `$BROWSER` environment variable
  in your .bashrc, .zshrc, or equivalent, e.g., `export BROWSER="lynx"`.

  If `bat` [4], `highlight` [5], or Pygments [6] is installed, notes are
  printed with syntax highlighting.

    1. https://pandoc.org/
    2. https://en.wikipedia.org/wiki/W3m
    3. https://en.wikipedia.org/wiki/Lynx_(web_browser)
    4. https://github.com/sharkdp/bat
    5. http://www.andre-simon.de/doku/highlight/en/highlight.php
    6. https://pygments.org/

Examples:
  nb show 1
  nb show example.md --render
  nb show "A Document Title" --print --no-color
  nb 1 show
  nb example:show 12
  nb show example:12
  nb example:12 show
  nb s 1
  nb 1 s
  nb s example:12
  nb example:12 s

Alias: `view`
Shortcut Alias: `s`
status
Usage:
  nb status

Description:
  Run `git status` the current notebook.
subcommands
Usage:
  nb subcommands [add <name>...] [alias <name> <alias>]
                 [describe <name> <usage>]

Subcommands:
  add       Add a new subcommand.
  alias     Create an <alias> of a given subcommand <name>, with linked help.
            Note that aliases must also be added with `subcommands add`.
  describe  Set the usage text displayed with `nb help <subcommand>`.
            This can be assigned as a heredoc, which is recommended, or
            as a string argument.

Description:
  List, add, alias, and describe subcommands. New subcommands, aliases, and
  descriptions are not persisted, so `add`, `alias`, `describe` are
  primarily for plugins.
sync
Usage:
  nb sync [-a, --all]

Options:
  -a, --all   Sync all unarchived notebooks.

Description:
  Sync the current local notebook with the remote repository.

Private Repositories and Git Credentials:
  Syncing with private repositories requires configuring git to not prompt
  for credentials.

  For repositories cloned over HTTPS, credentials can be cached with git.
  For repositories cloned over SSH, keys can be added to the ssh-agent.

  More Information:
    https://github.com/xwmx/nb#private-repositories-and-git-credentials

Sync Conflict Resolution:
  When `nb sync` encounters a conflict in a text file and can't merge
  overlapping local and remote changes, both versions are saved in the
  file, separated by git conflict markers. Use `nb edit` to remove the
  conflict markers and delete any unwanted text.

  When `nb sync` encounters a conflict in a binary file, such as an
  encrypted note or bookmark, both versions of the file are saved in the
  notebook as individual files, one with `--conflicted-copy` appended to
  the filename.

  More Information:
    https://github.com/xwmx/nb#sync-conflict-resolution
update
Usage:
  nb update

Description:
  Update `nb` to the latest version. You will be prompted for
  your password if administrator privileges are required.

  If `nb` was installed using a package manager like npm or
  Homebrew, use the package manager's upgrade functionality instead
  of this command.
use
Usage:
  nb use <notebook>

Description:
  Switch to the specified notebook. Shortcut for `nb notebooks use`.

Example:
  nb use example

Shortcut Alias: `u`
version
Usage:
  nb version

Description:
  Display version information.
Plugins
backlink
Usage:
  nb backlink [--force]

Description:
  Add backlinks to notes. Crawl notes in a notebook for
  and append a "Backlinks" section to each linked file that lists passages
  referencing the note.

  To link to a note from within another note, surround the title of the
  target note in double square brackets:

      Example with link to  in content.

  Depends on note-link-janitor:
    https://github.com/andymatuschak/note-link-janitor

    Requirement: every note in the notebook must have a title.
copy
Usage:
  nb copy (<id>, <filename>, <path>, <title>)

Description:
  Create a copy of the specified item in the current notebook.

Alias: `duplicate`
ebook
Usage:
  nb ebook new <name>
  nb ebook publish

Subcommands:
  ebook new      Create a new notebook initialized with placeholder files for
                 authoring an ebook.
  ebook publish  Generate a .epub file using the current notebook contents.

Description:
  Ebook authoring with `nb`.

  `nb ebook new` creates a notebook populated with initial placeholder files
  for creating an ebook. Edit the title page and chapters using normal `nb`
  commands, then use `nb ebook publish` to generate an epub file.

  Chapters are expected to be markdown files with sequential numeric
  filename prefixes for ordering:

    01-example.md
    02-sample.md
    03-demo.md

  Create new chapters with `nb add`:

    nb add --filename "04-chapter4.md"

  title.txt contains the book metadata in a YAML block. For more information
  about the fields for this file, visit:

    https://pandoc.org/MANUAL.html#epub-metadata

  stylesheet.css contains base styling for the generated ebook. It can be used
  as it is and can also be edited using `nb edit`.

  As with all `nb` notebooks, changes are recorded automatically in git,
  providing automatic version control for all ebook content, source, and
  metadata files.

  Generated epub files are saved in the notebook and can be previewed in the
  terminal with `nb show`. Export a generated epub file with `nb export`:

    nb export 12 .

More info:
  https://pandoc.org/epub.html
example
Usage:
  nb example

Description:
  Print "Hello, World!"
Specifications
nb Markdown Bookmark File Format
Extension
.bookmark.md
Description
nb bookmarks are Markdown documents created using a combination of
user input and data from the bookmarked page. The nb bookmark format
is intended to be readable, editable, and clearly organized for
greatest accessibility.
Bookmarks are identified by a .bookmark.md file extension. The
bookmark URL is the first URL in the file within < and > characters.
To create a minimally valid bookmark file with nb add:
nb add example.bookmark.md --content "<https://example.com>"
This creates a file with the name example.bookmark.md containing:
<https://example.com>
In a full bookmark, information is separated into sections,
with each bookmark section indicated by a Markdown h2 heading.
Example
# Example Title (example.com)

<https://example.com>

## Description

Example description.

## Quote

> Example quote line one.
>
> Example quote line two.

## Comment

Example comment.

## Related

- <https://example.net>
- <https://example.org>

## Tags

#tag1 #tag2

## Content

Example Title
=============

This domain is for use in illustrative examples in documents. You may
use this domain in literature without prior coordination or asking for
permission.

[More information\...](https://www.iana.org/domains/example)

## Source

```html
<!doctype html>
<html>
  <head>
    <title>Example Title</title>
    <meta name="description" content="Example description." />
  </head>

  <body>
    <h1>Example Title</h1>
    <p>
      This domain is for use in illustrative examples in documents. You may
      use this domain in literature without prior coordination or asking for
      permission.
    </p>
    <p>
      <a href="https://www.iana.org/domains/example">More information...</a>
    </p>
  </body>
</html>
```
Elements
Title
Optional
A markdown h1 heading containing the content of the bookmarked page's
HTML <title> or og:title tag, if present, followed by
the domain within parentheses.
Examples
# Example Title (example.com)
# (example.com)
URL
Required
The URL of the bookmarked resource, with surrounding angle brackets
(<, >).
This is the only required element.
## Description
Optional
A text element containing the content of the bookmarked page's meta description
or og:description tag, if present.
## Quote
Optional
A markdown quote block containing a user-specified excerpt from the bookmarked
resource.
## Comment
Optional
A text element containing a comment written by the user.
## Related
Optional
A Markdown list of angle bracketed (<, >) URLs that are related to the
bookmarked resource.
## Tags
Optional
A list of tags represented as hashtags separated by individual spaces.
## Content
Optional
The full content of the bookmarked page, converted to Markdown.
The ## Content section makes the page content available locally for
full-text search and viewing of page content. The source HTML is converted
to inline Markdown to reduce the amount of markup, make it more readable,
and make page conent easily viewable in the terminal as markdown and
streamlined HTML in terminal web browsers.
## Source
Optional
A fenced code block with html language identifier containing the source HTML
from the bookmarked page.
nb does not save the page source by default. nb uses this section to save
the source HTML page content when pandoc is not available to convert it to
Markdown.
nb Notebook Specification
An nb notebook is a directory that contains a valid .git directory,
indicating that it has been initialized as a git repository, and a .index
file.
.index File
The notebook index is a text file named .index in the notebook directory.
.index contains a list of filenames, one per line, and the line number of
each filename represents the id. .index is included in the git repository
so ids are preserved across systems.
Operations
index Subcommand
nb manages the .index using an internal index subcommand.
nb help index
Usage:
  nb index add <filename>
  nb index delete <filename>
  nb index get_basename <id>
  nb index get_id <filename>
  nb index get_max_id
  nb index rebuild
  nb index reconcile
  nb index show
  nb index update <existing-filename> <new-filename>
  nb index verify

Subcommands:
  add           Add <filename> to the index.
  delete        Delete <filename> from the index.
  get_basename  Print the filename / basename at the specified <id>.
  get_id        Get the id for <filename>.
  get_max_id    Get the maximum id for the notebook.
  rebuild       Rebuild the index, listing files by last modified, reversed.
                Some ids will change. Prefer `nb index reconcile`.
  reconcile     Remove duplicates and update index for added and deleted files.
  show          Print the index.
  update        Overwrite the <existing-filename> entry with <new-filename>.
  verify        Verify that the index matches the notebook contents.

Description:
  Manage the index for the current notebook. This subcommand is used
  internally by `nb` and using it manually will probably corrupt
  the index. If something goes wrong with the index, fix it with
  `nb index reconcile`.

  The index is a text file named '.index' in the notebook directory. .index
  contains a list of filenames and the line number of each filename
  represents the id. .index is included in the git repository so ids are
  preserved across systems.
Archived Notebooks
A notebook is considered archived when it contains a file named .archived
at the root level of the notebook directory.
Tests
To run the test suite, install
Bats
and the
recommended dependencies,
then run bats test in the project root.